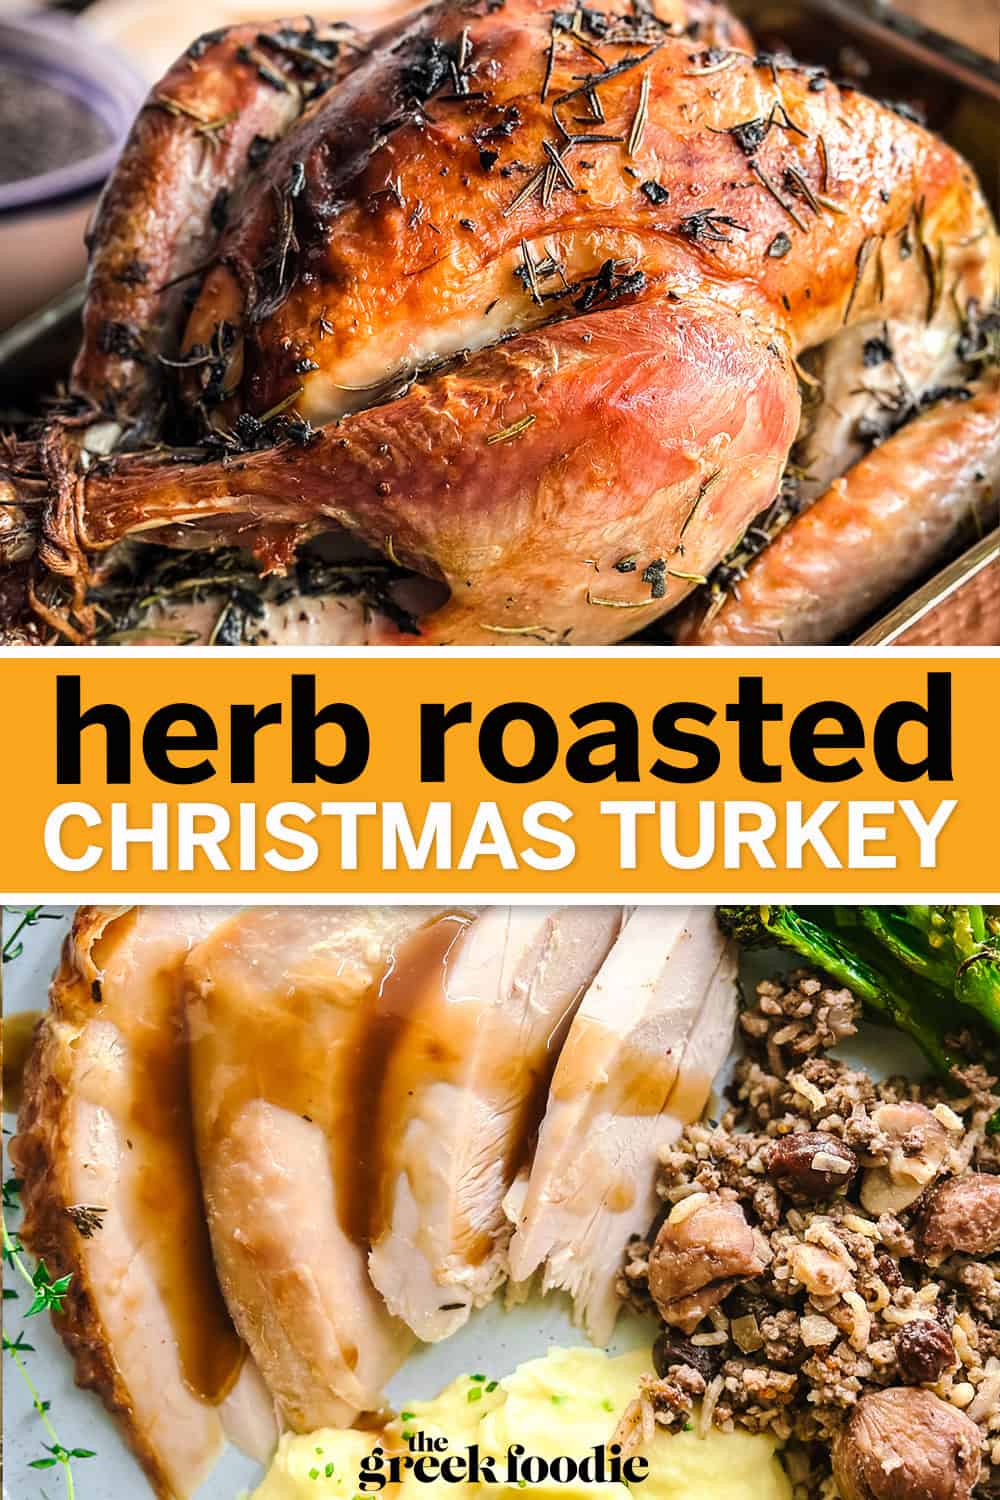

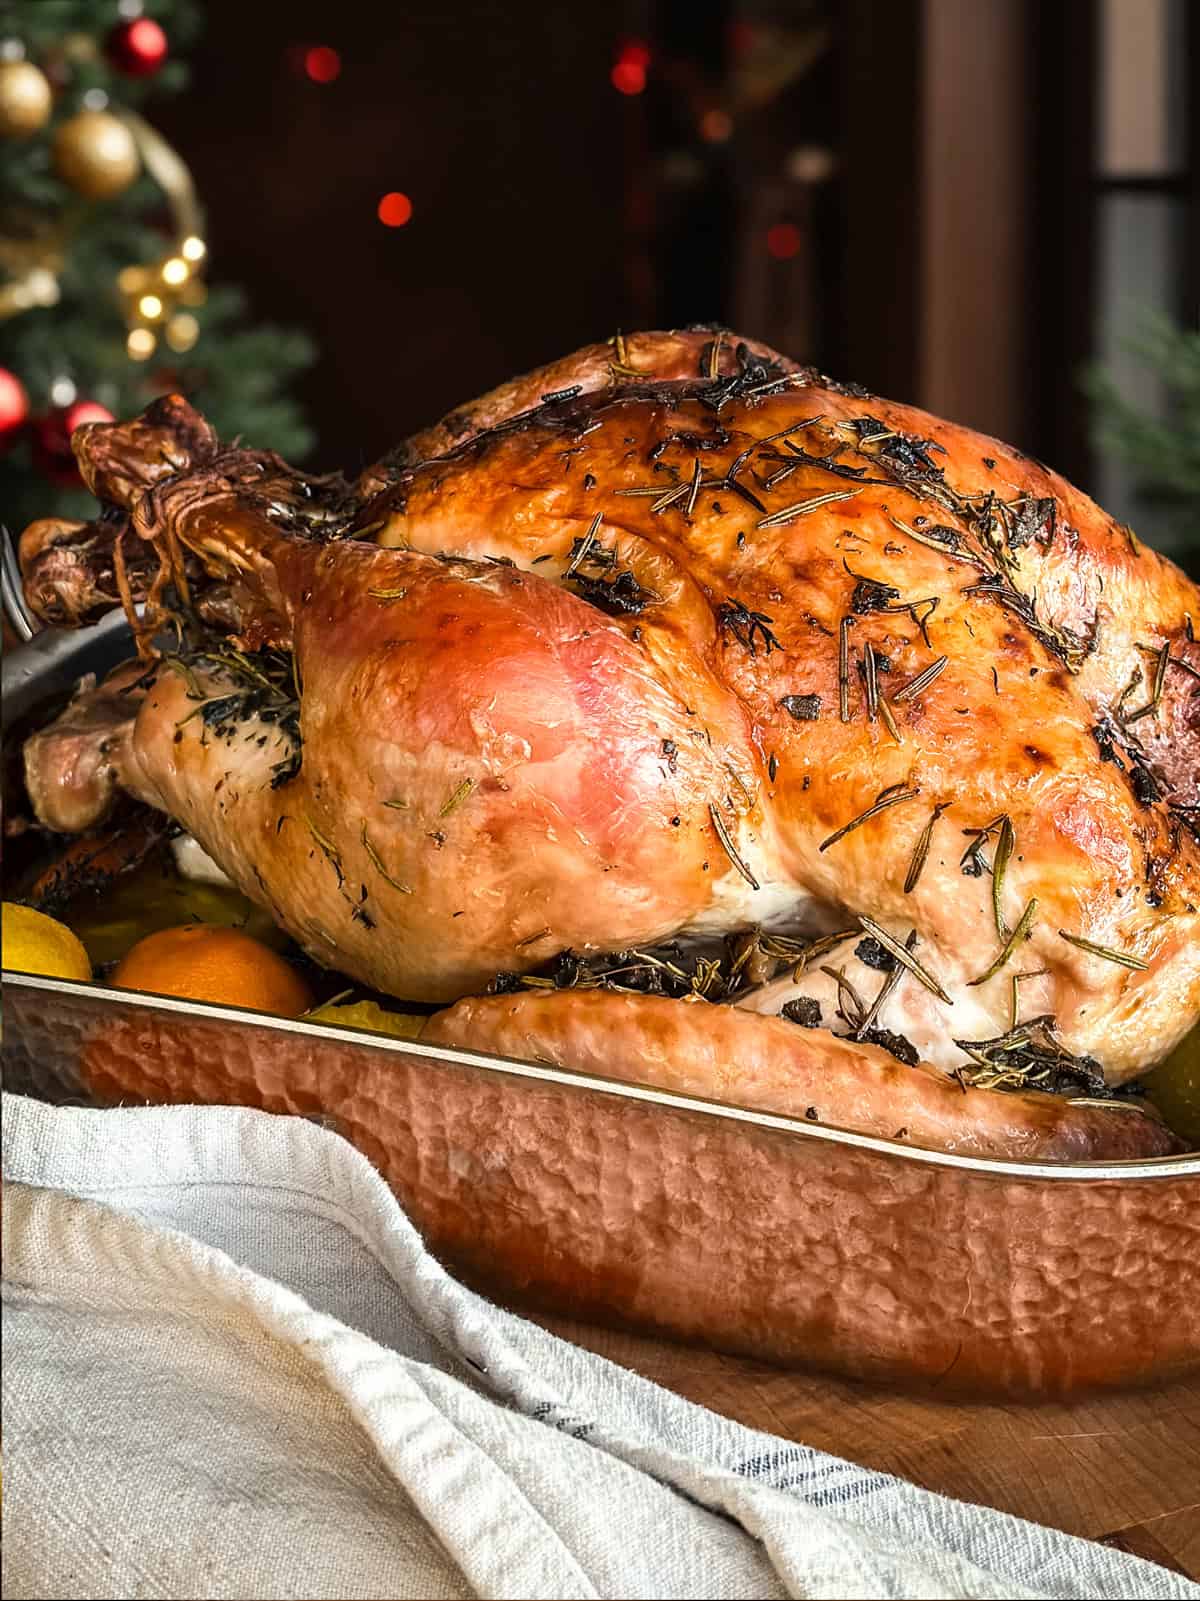
This Christmas turkey is the star of the holiday table. Juicy on the inside, golden and crisp on the outside, it’s infused with fresh herbs, garlic, and citrus for unbeatable flavor. A simple compound butter tucked under the skin keeps the meat tender while filling the kitchen with irresistible aromas. It’s the kind of turkey that makes everyone gather closer and linger longer around the feast.
If you’re a fan of our delicious Herb Butter Christmas Turkey, you’re in for a treat with our Roasted Turkey Thighs, Christmas Pot Roast, and Roasted Leg of Lamb!
Why you will love our Christmas turkey
Here is what you need
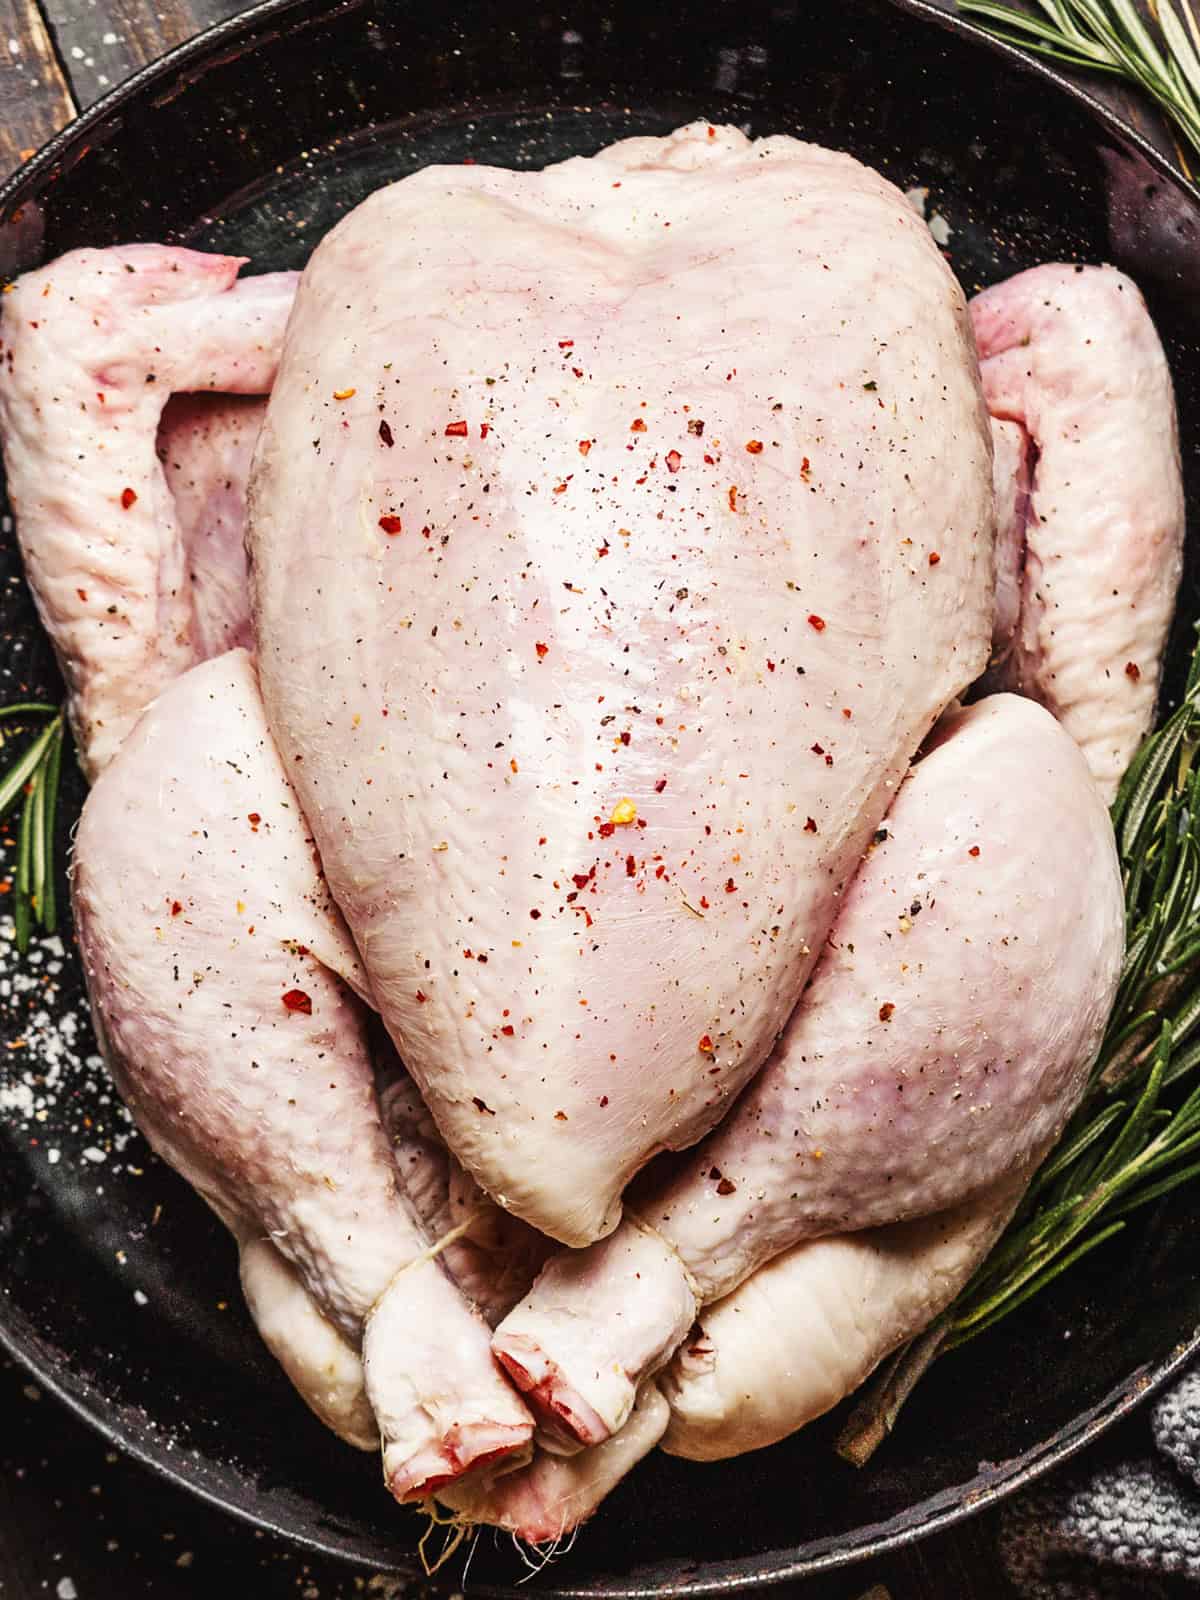
- Turkey – Choose the best quality bird you can find. An organic, free-range turkey from a farm you trust will always deliver superior flavor and texture, thanks to a natural diet and humane raising practices. If that’s not available, a high-quality frozen turkey works beautifully too—just be sure to thaw it properly in the fridge (24 hours per 4–5 pounds).
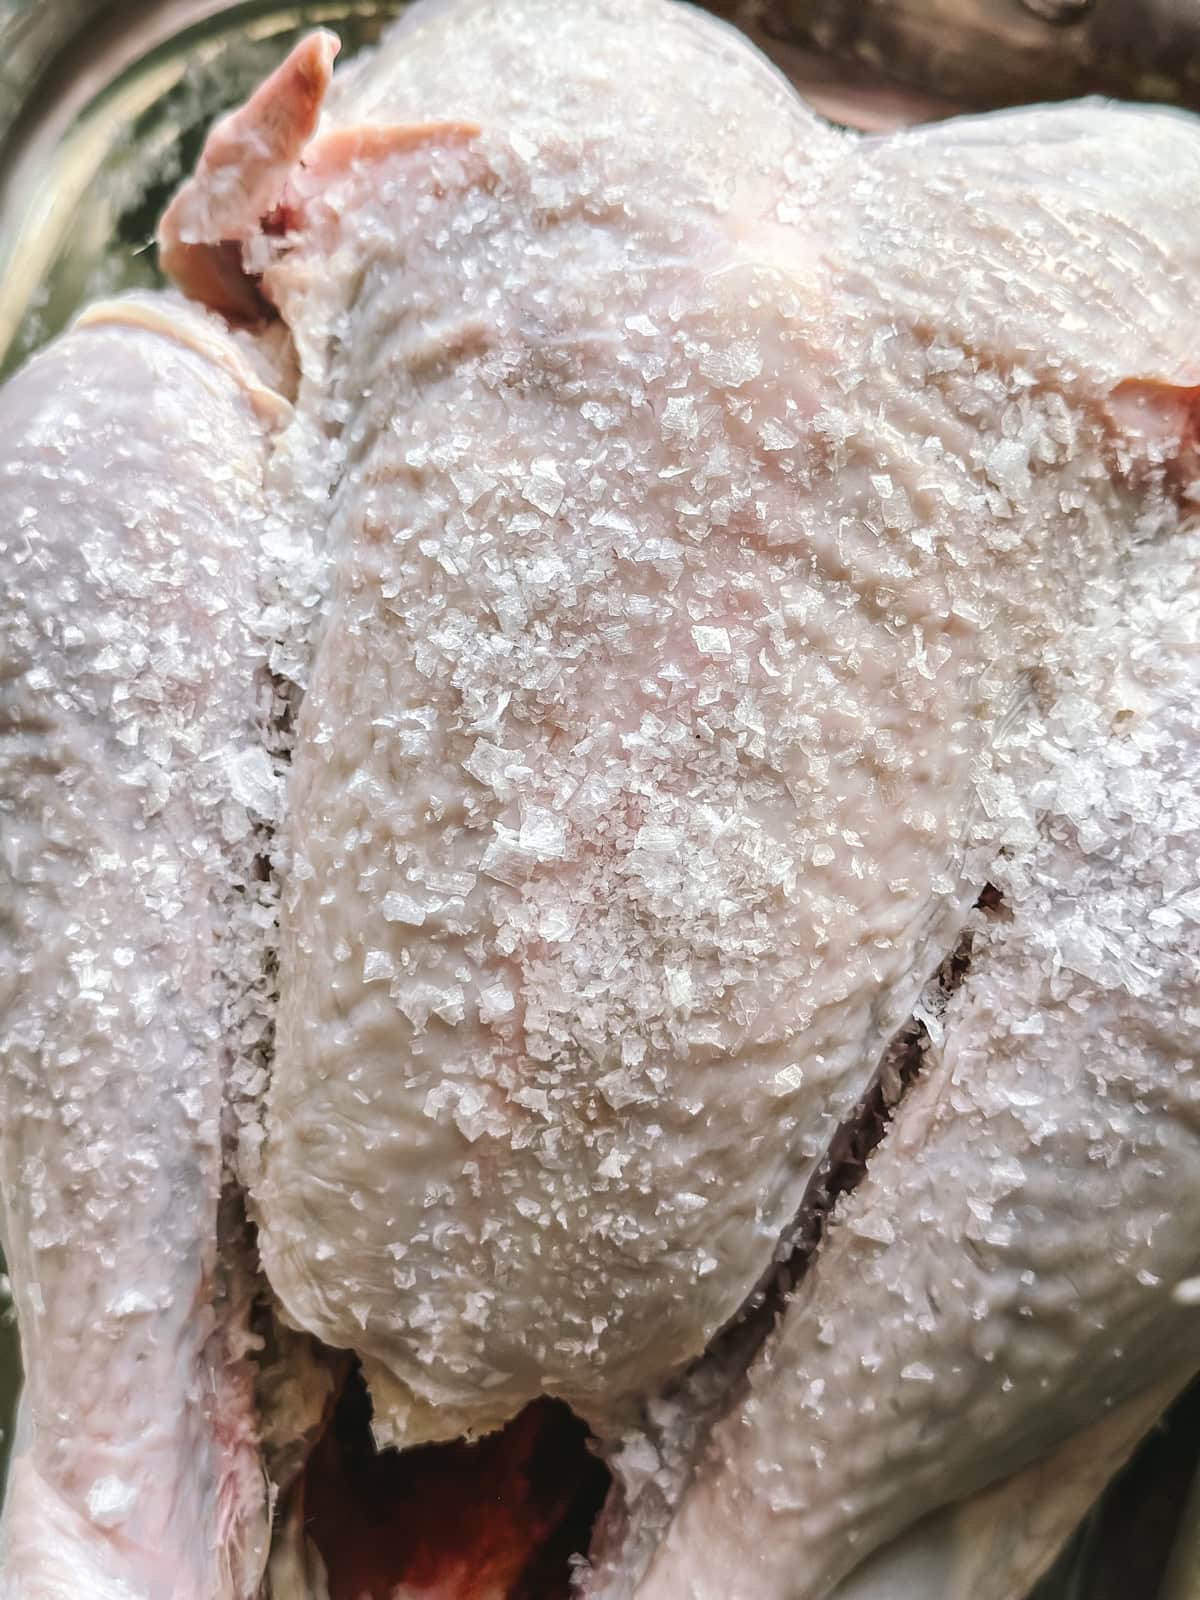
- Coarse Sea Salt – Essential for dry brining, which seasons the turkey all the way through and helps achieve crisp golden skin. You’ll need at least half a cup of salt for a medium bird. Kosher salt also works perfectly.
- Fresh Herbs – Rosemary, thyme, sage, and oregano are the stars of a festive turkey. Their earthy, piney, and slightly peppery flavors pair beautifully with poultry, especially when tucked under the skin with butter. Fresh is best, but dried thyme or sage can be used if needed.
- Butter – Use plenty of good-quality unsalted butter. It carries the flavor of the herbs and garlic, bastes the meat from within, and guarantees that irresistible golden, crisp skin. This is the magic ingredient that transforms a simple roast turkey into a Christmas showstopper.
- Root Vegetables – Carrots, onions, garlic, turnips, and celeriac form a flavorful base for the roasting pan. As they cook, they release juices that mingle with turkey drippings to create a rich, aromatic foundation for your gravy. They also help elevate the turkey so it roasts more evenly.
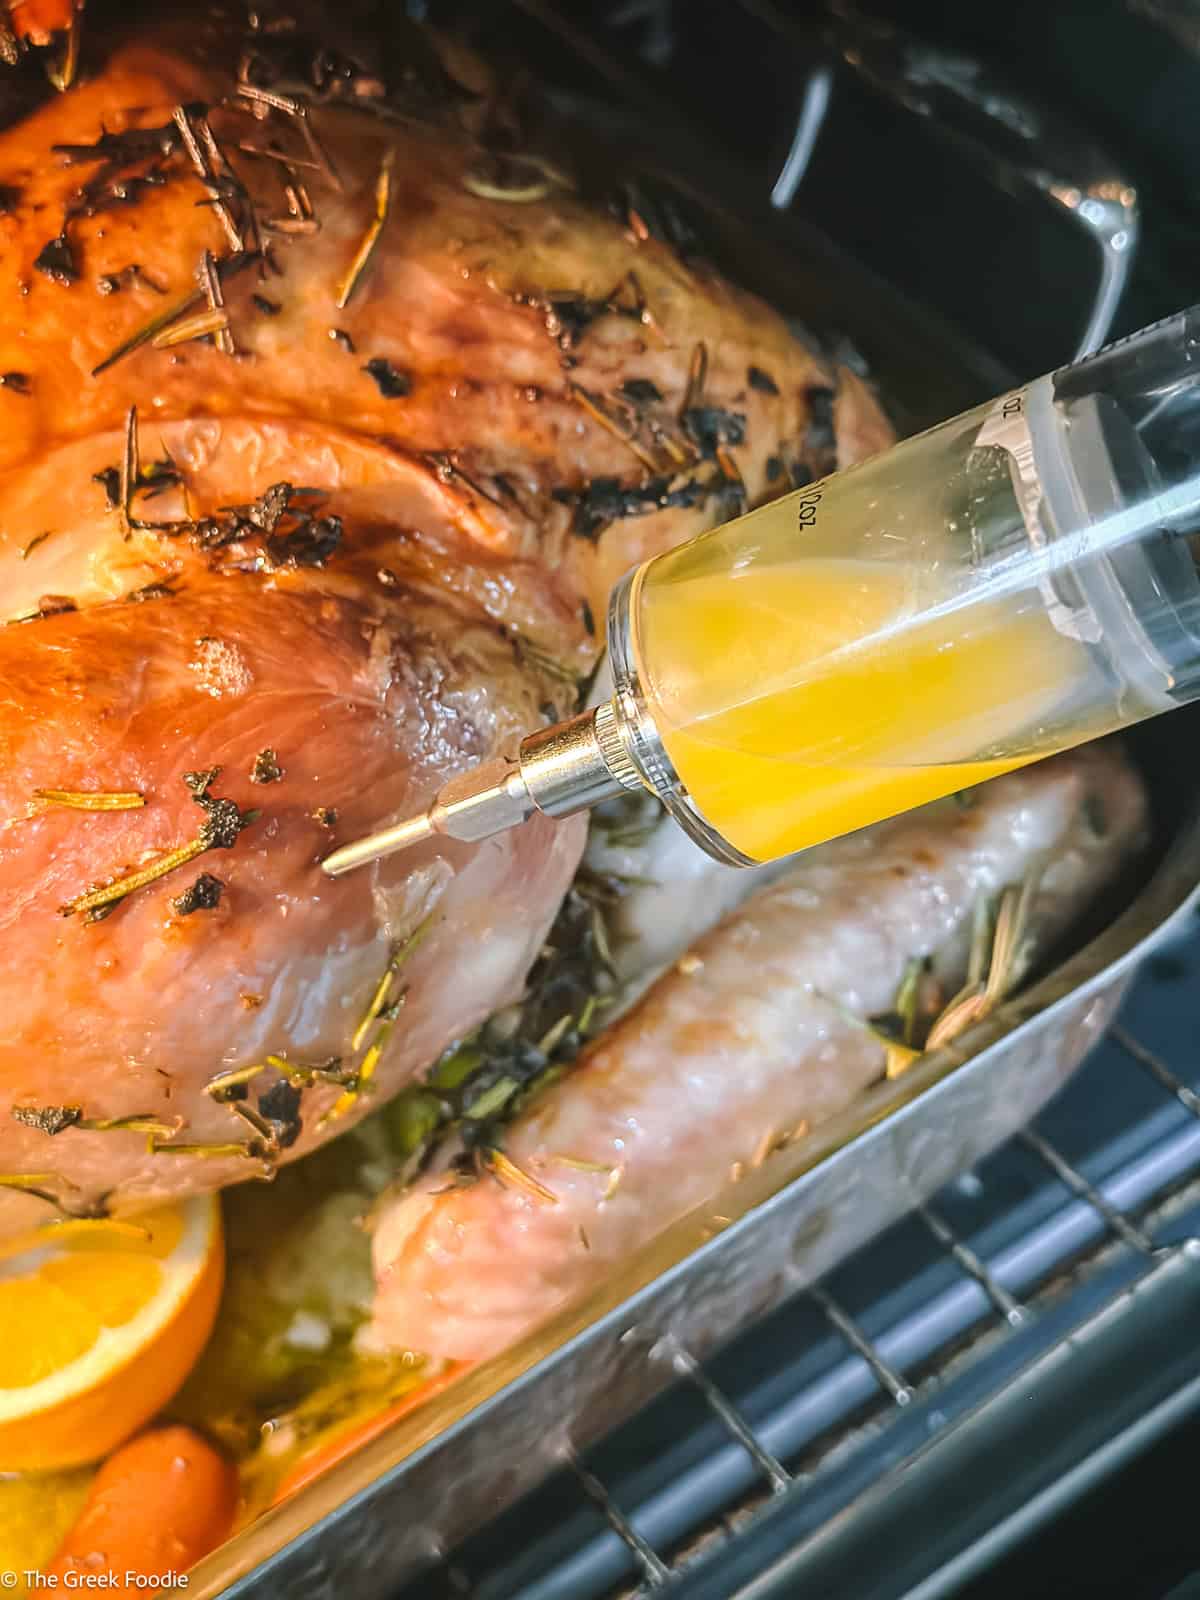
- Meat Injector Syringe – An optional but highly recommended tool. Injecting melted herb butter directly into the breast and thigh meat keeps the turkey extra juicy and flavorful from the inside out. It’s especially helpful for larger birds, where the breast can dry out before the legs are fully cooked.
Step by step
Step 1: Dry Brine the Turkey
- Start at least one day (and up to three days) before roasting. Remove the giblets from the cavity, then pat the turkey completely dry inside and out with paper towels.
- Generously season with coarse sea salt or kosher salt (never table salt, as the fine grains make the bird too salty). Use about 1 tablespoon of salt per pound of turkey. The larger salt crystals of coarse or kosher salt are perfect for dry brining, helping to draw out moisture, which then reabsorbs back into the meat, leaving it juicy and well-seasoned.
- Place the salted turkey on a rack set inside a rimmed baking sheet (to catch drippings) or directly in your roasting pan. Refrigerate uncovered for at least 1 hour per pound (so about 14 hours for a 14-pound turkey). You can leave it for up to 3 days for maximum flavor.
- If leaving a raw turkey uncovered in the fridge makes you uneasy, loosely cover it with plastic wrap or a brining bag. For the crispiest skin, uncover the turkey for the final 6 hours before cooking.
- No need to rinse before roasting — the salt fully absorbs and seasons the bird without leaving residue.
Step 2: Stuff and Secure the Turkey
- Tuck or protect the wings – Fold the wings under the turkey so they don’t burn while roasting. If you prefer to leave them extended, wrap them in aluminum foil for protection.
- When you’re ready to roast, do not wash the turkey. Simply brush off any excess salt from the skin.
- Prepare the Greek stuffing and have it ready to go.
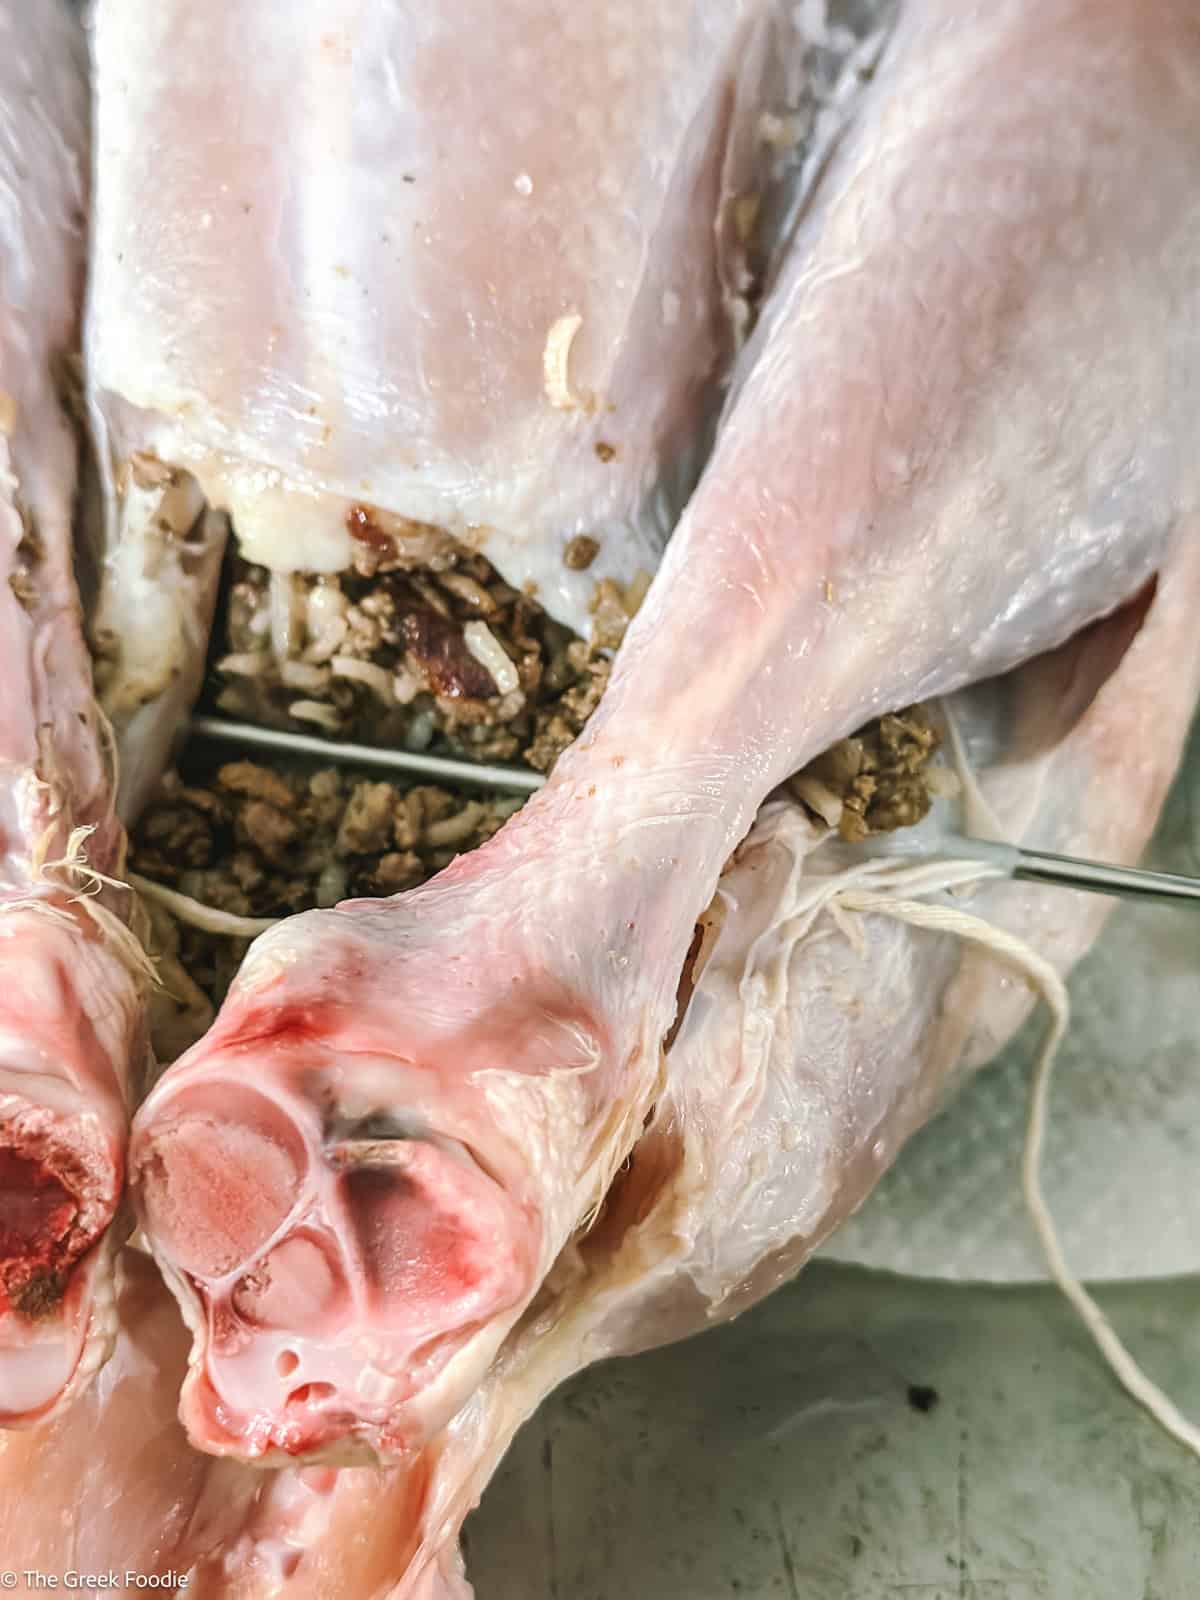
- Fill the neck cavity – Turn the turkey upside down and gently spoon the stuffing into the neck cavity. Once filled, pull the neck skin over the stuffing and secure it neatly underneath the turkey. You can sew it closed with kitchen thread, or use a long toothpick or skewer.
- Close the main cavity – Use a sturdy needle with kitchen twine, or a long skewer with twine tied tightly to one end. Pierce the loose skin flap on one side of the cavity and thread it across to the other, pulling it snug. Repeat if necessary to hold the stuffing securely. Then cross the turkey’s legs and tie them tightly with the remaining twine to keep everything in place.
Pro Tip
For extra-crispy skin, leave the turkey uncovered in the fridge for the last 6 hours of the brining time.
Step 3: Make the Herb Butter
- You can prepare the herb butter a day ahead and refrigerate it, allowing the flavors to meld. Just bring it back to room temperature before using so it spreads easily.
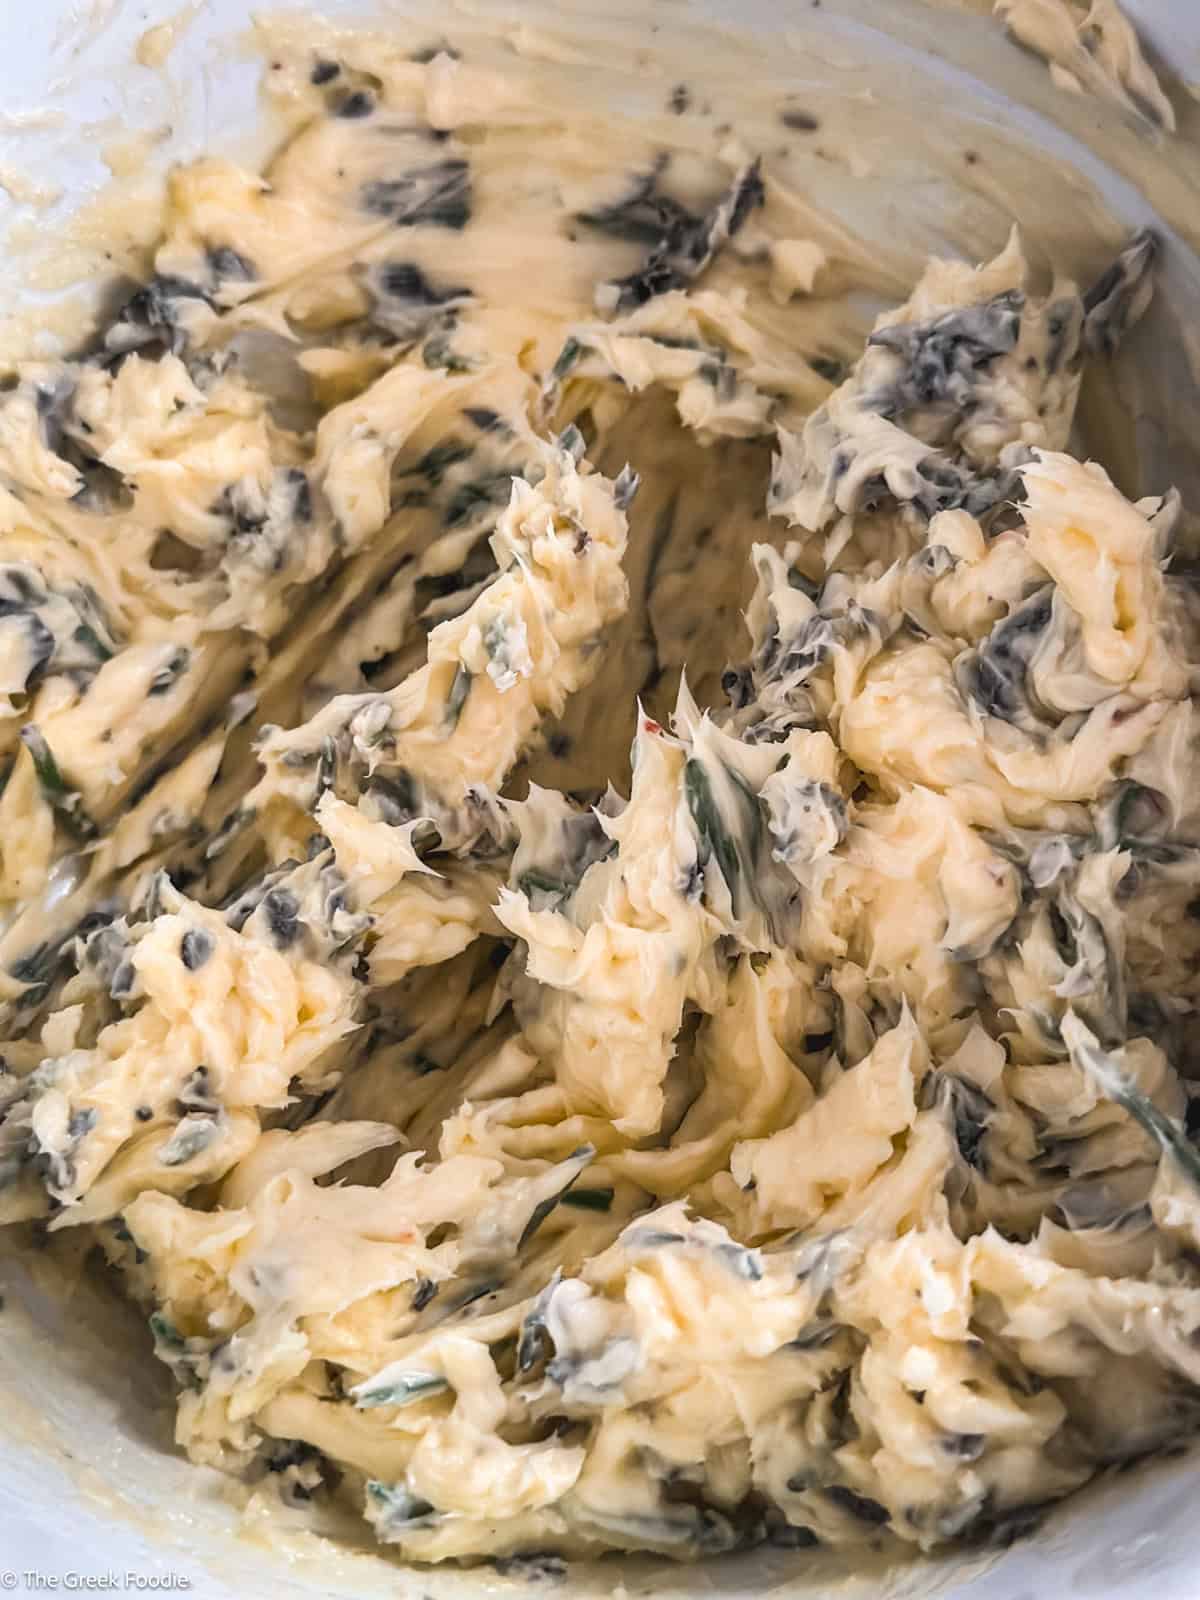
- Finely chop the fresh herbs with a sharp knife or pulse them in a food processor. In a small bowl, mix the herbs with the softened butter until smooth and fragrant. The butter should be spreadable, not melted.
Step 4: Butter the Turkey
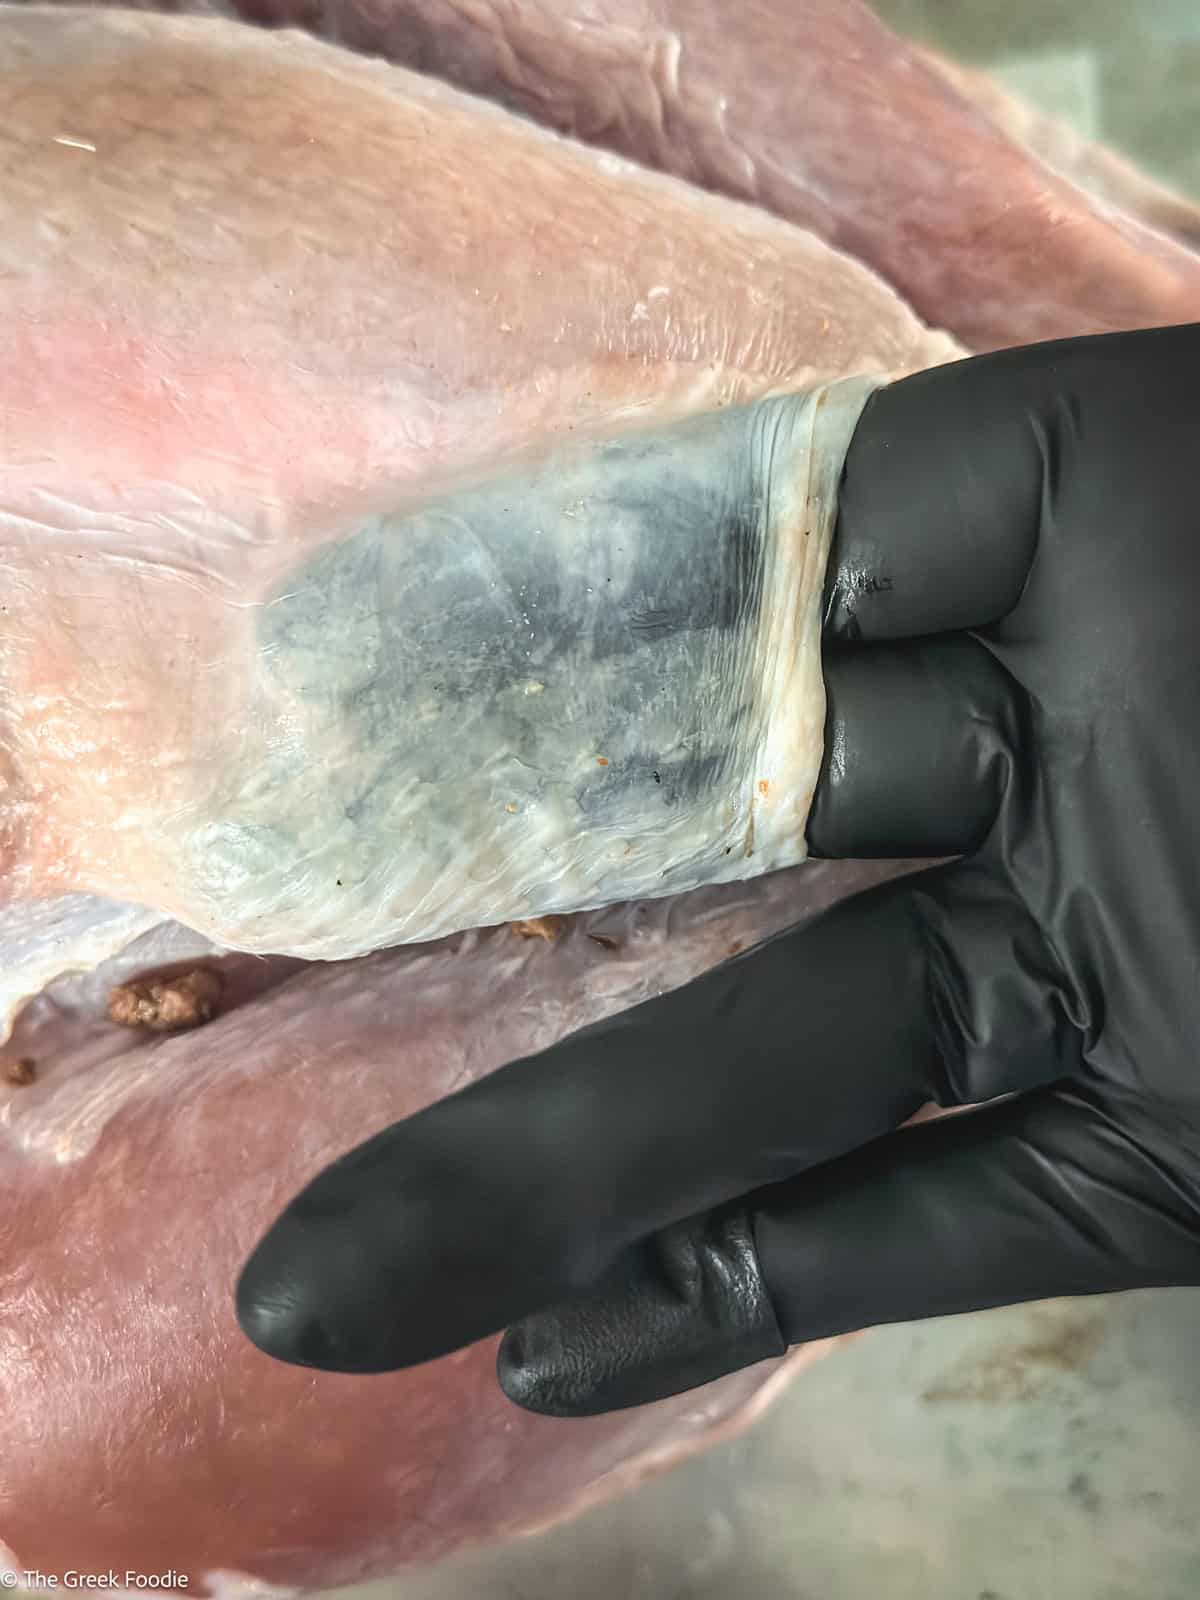
- Spread some of the herb butter directly under the skin, pressing it evenly over the meat. Don’t worry if you can’t reach every spot—just get as much coverage as possible.
- Gently loosen the skin over the turkey breast, sliding your hand underneath as far as you can without tearing it.
Pro Tip
Slide a spoon or spatula under the skin if you find it tricky with your hands—this helps spread the butter evenly without tearing.
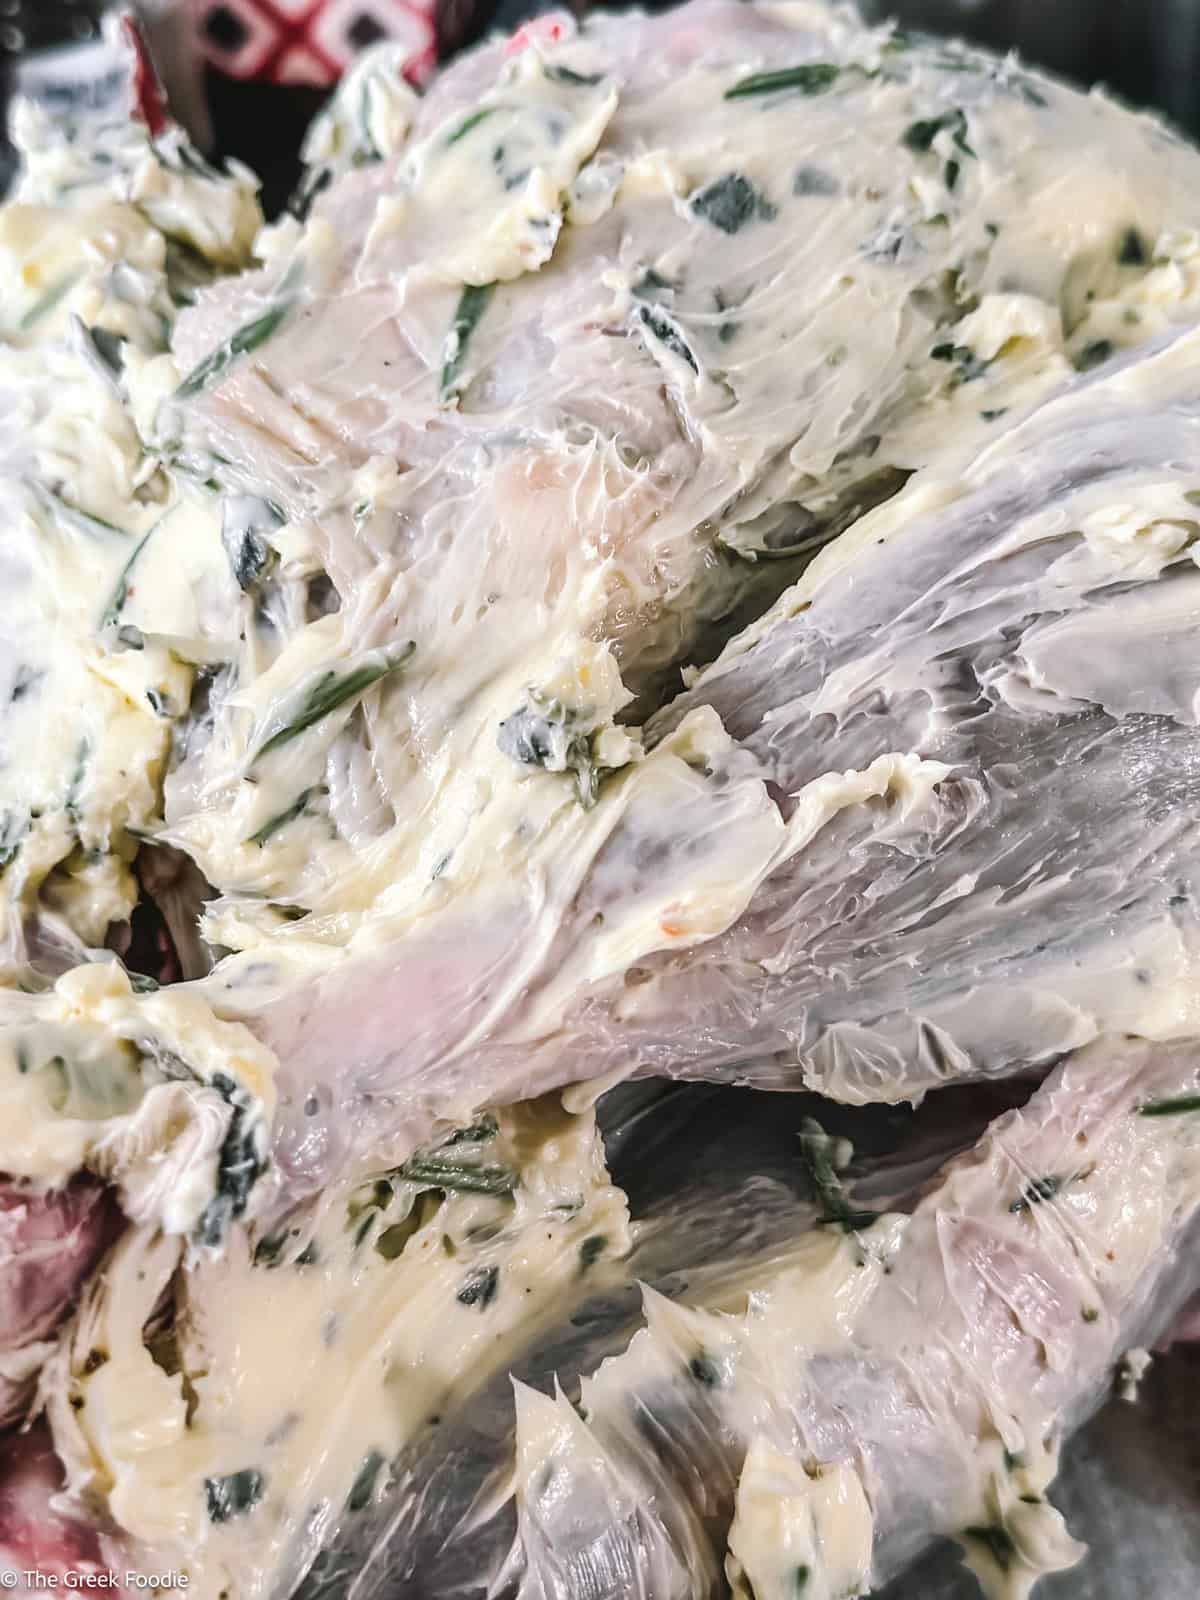
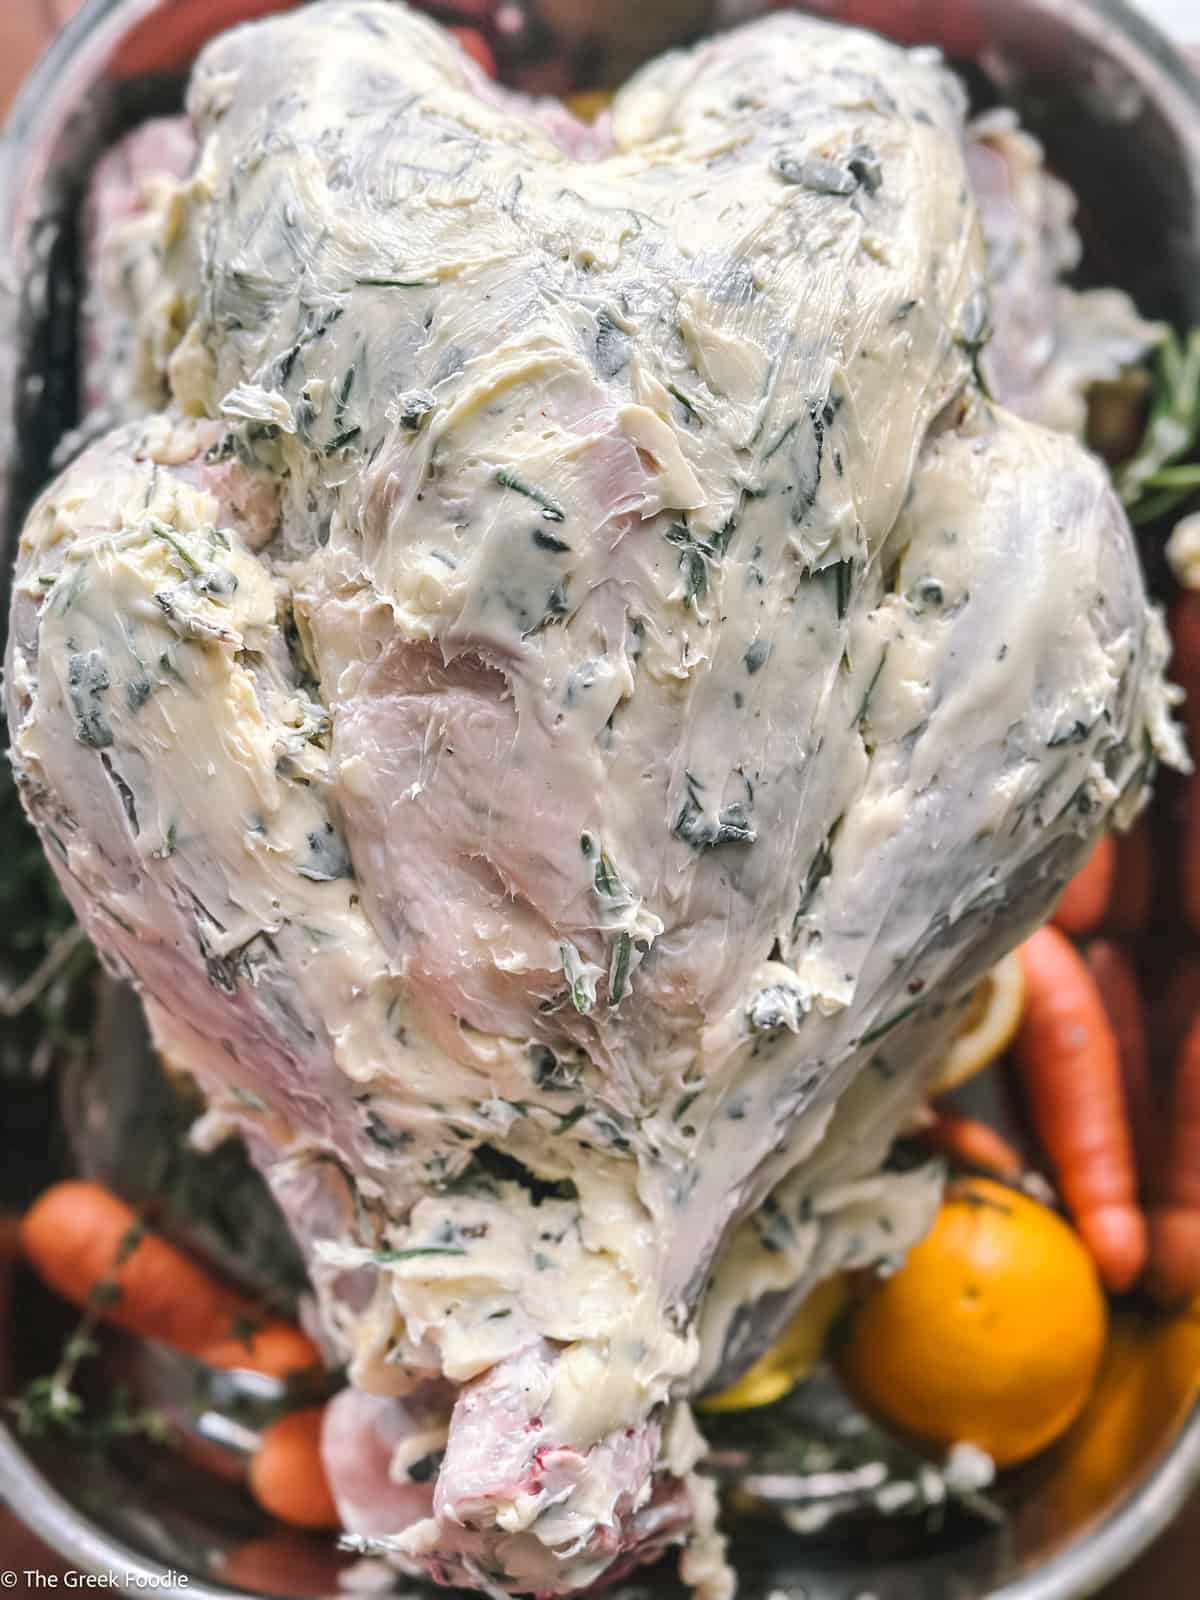
- Rub the remaining herb butter generously all over the outside of the turkey, coating the skin, legs, and wings. It may seem like a lot of butter, but this is what ensures the meat stays juicy and the skin turns beautifully golden and crisp.
Step 5: Roast the Turkey
- After the first hour, lower the oven temperature to 180°C / 355°F. Remove the foil and continue roasting uncovered so the skin can turn golden and crisp.
- Lay the buttered turkey on top of the prepared bed of vegetables, fruits, and herbs in your roasting pan. Cover the bird loosely with aluminum foil to prevent the skin from browning too quickly.
- Place the turkey in a preheated oven at 200°C / 400°F and roast for 1 hour.
Step 6: Infuse with Butter
- Using a meat injector syringe, inject the melted butter into the thickest parts of the thighs and breasts every 30 minutes during roasting. This step keeps the turkey exceptionally juicy and ensures the meat is rich and flavorful all the way through.
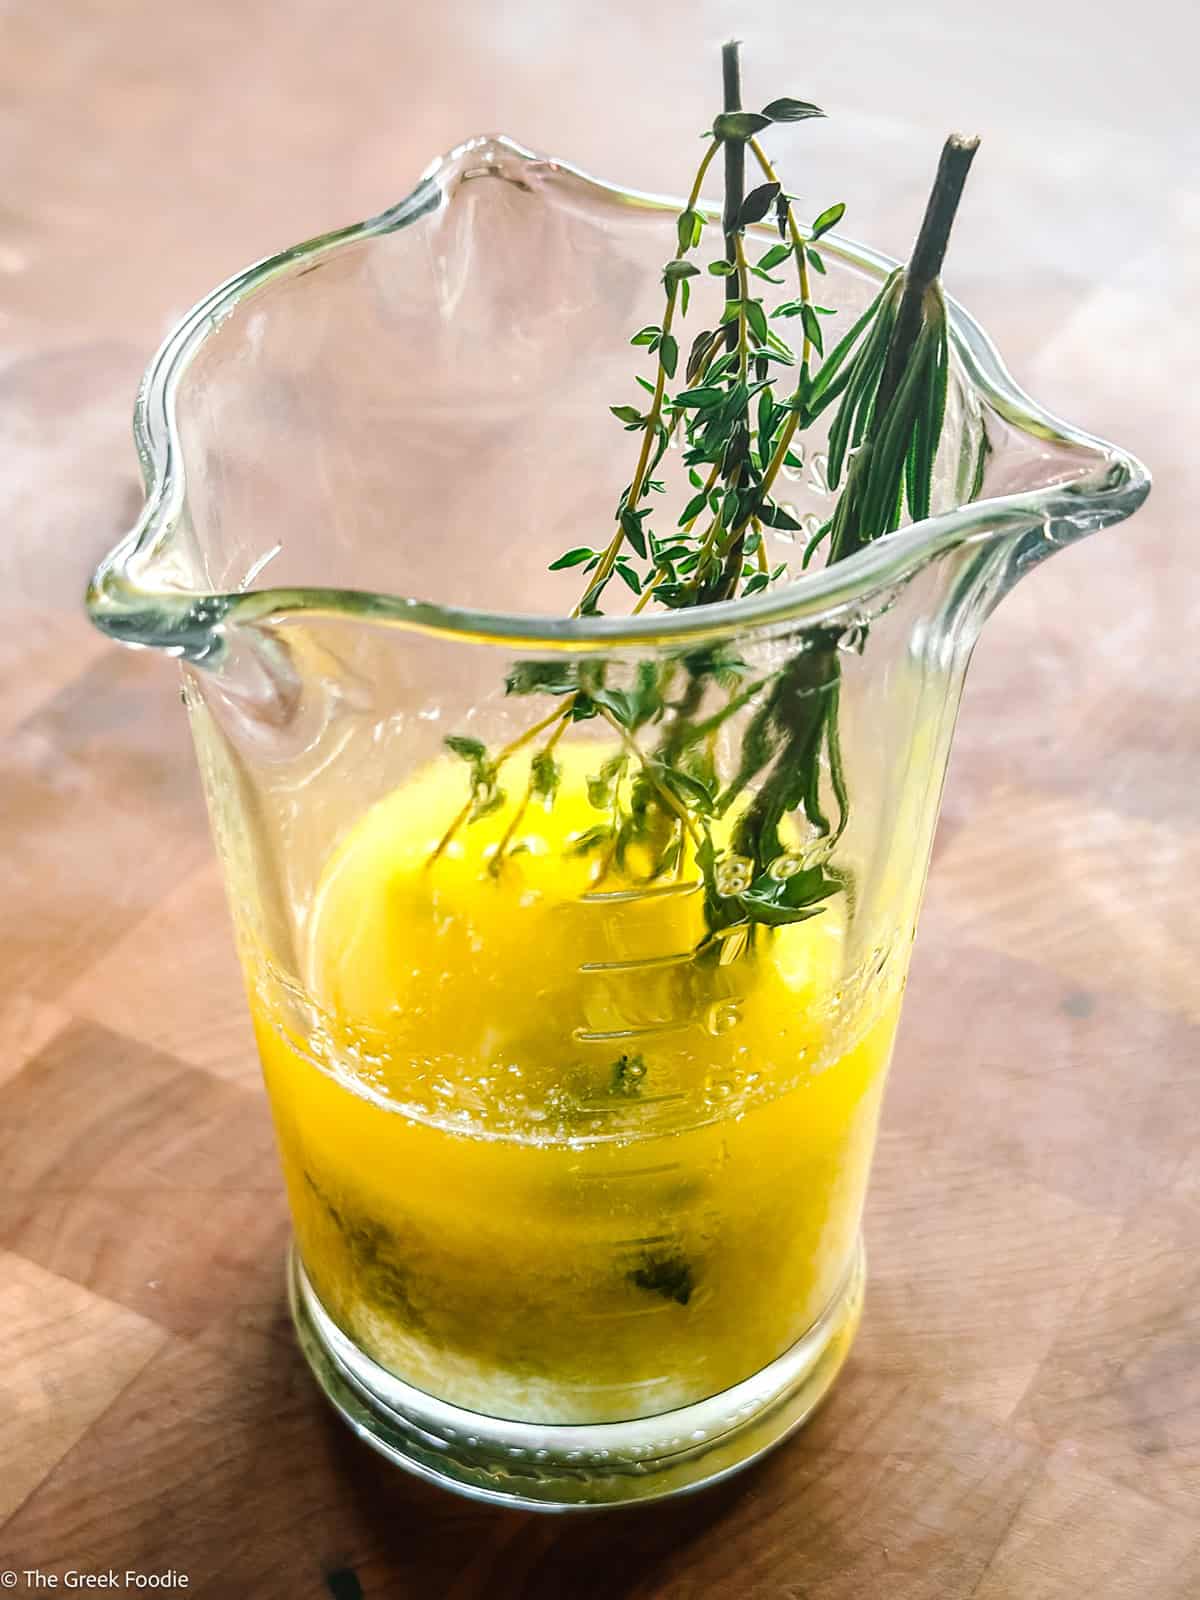
- Melt the remaining herb butter in a small cup or saucepan and stir in a few extra sprigs of fresh herbs to infuse it with even more flavor.
Step 7: Finish Roasting & Make the Gravy
- Meanwhile, pass the pan drippings through a fine sieve and use them as the flavorful base for your Christmas turkey gravy.
- Once the infused butter is gone, continue by drawing up the buttery drippings from the bottom of the pan with your injector. These drippings are liquid gold, packed with the flavors of citrus, garlic, herbs, and melted butter from the turkey itself. Inject them into the breast and thigh meat for maximum juiciness and flavor.
- A stuffed turkey generally needs about 15 minutes of roasting per pound at 180°C / 355°F. Always rely on a meat thermometer rather than time alone: the thickest part of the thigh (without touching the bone) should register 74°C / 165°F.
- When done, transfer the turkey to a platter, tent loosely with foil, and let it rest for 30 minutes before carving. This allows the juices to redistribute for tender slices.
Pro Tip
Don’t skip the 30-minute resting time—this is what locks the juices in and keeps every slice moist.
Make the Gravy
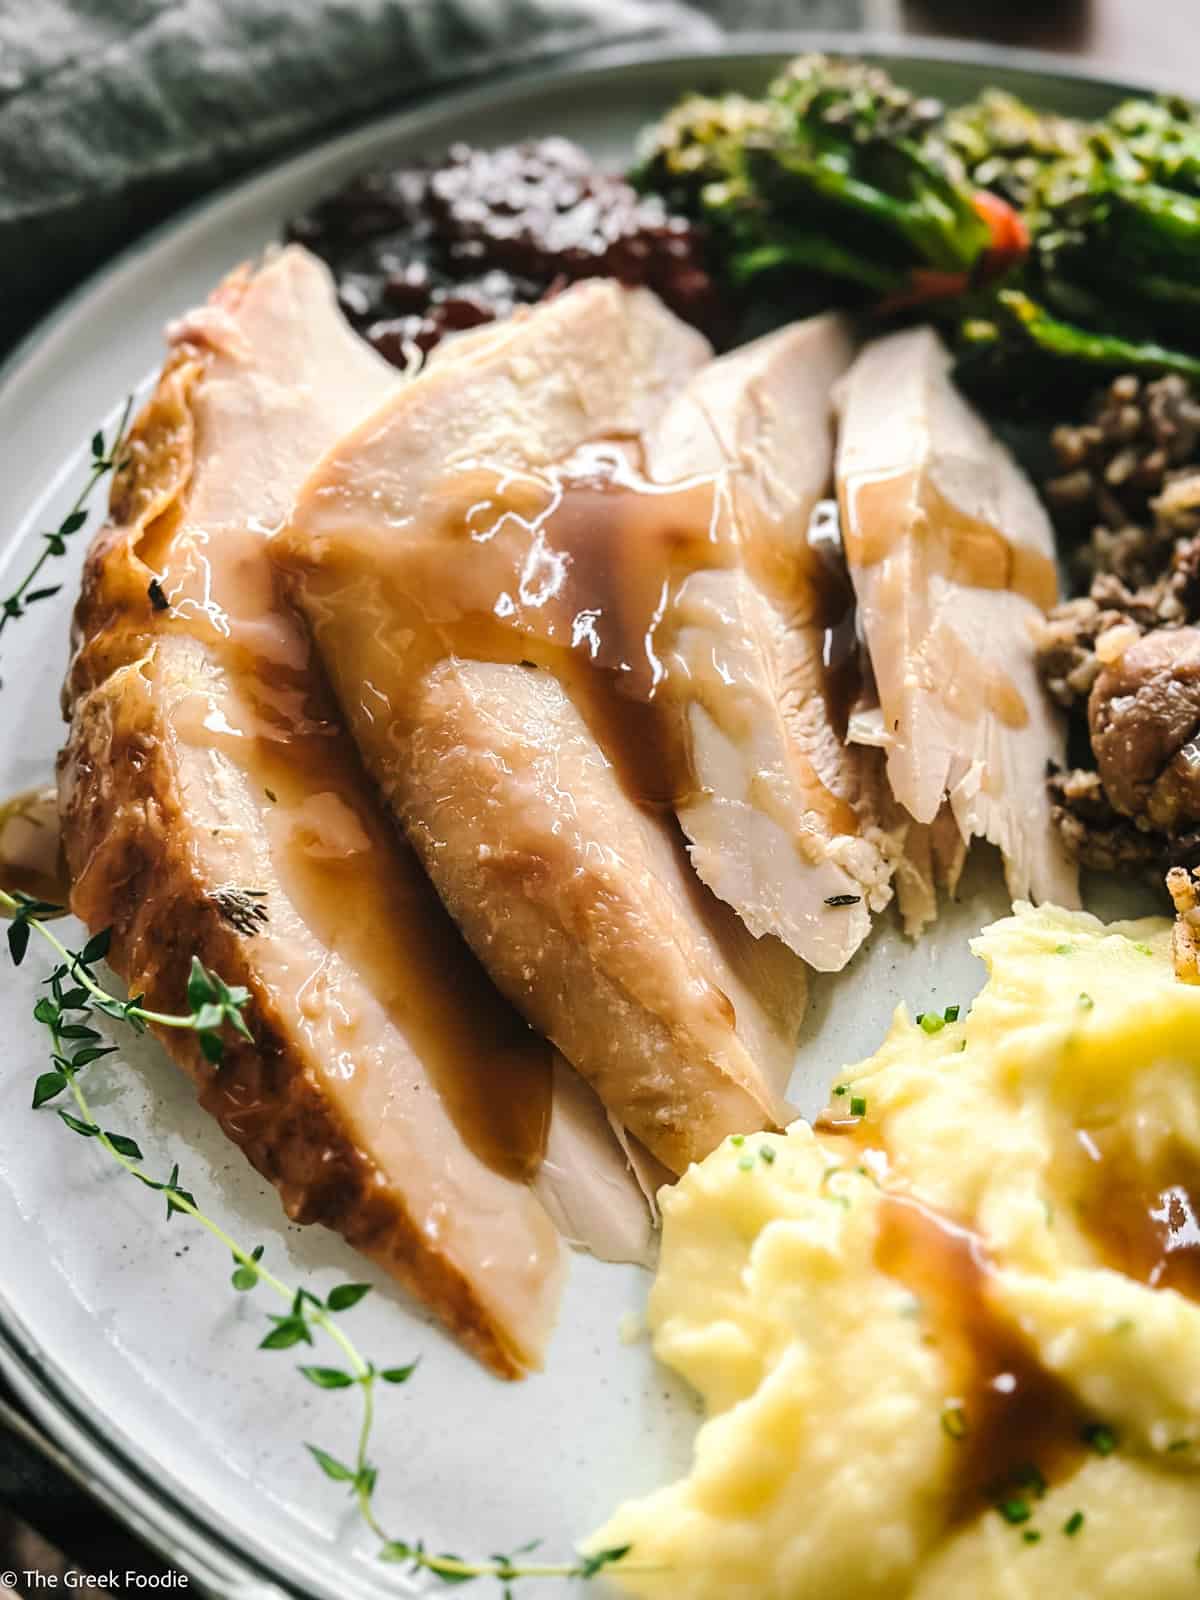
Rich, velvety gravy is the perfect finishing touch for your Christmas turkey. Use the flavorful pan drippings combined with stock to create a silky sauce that ties the whole feast together.
You will need:
- 1 ½ cups turkey drippings
- ½ cup all-purpose flour
- 2 cups turkey stock (or chicken stock)
- Freshly ground black pepper
Instructions:
- In a saucepan, heat ½ cup of the turkey drippings over medium-low heat for about 3 minutes.
- Whisk in the flour to form a roux, cooking until golden and nutty, about 5 minutes.
- Gradually whisk in the remaining drippings, then slowly pour in the turkey stock while continuing to whisk.
- Increase the heat to medium and cook until the gravy is smooth and creamy, whisking constantly. This takes 5–10 minutes, depending on how thick you like your gravy.
- Season with freshly ground black pepper to taste and serve immediately alongside the turkey.
Gravy Secrets
- Prefer richer flavor? Stir in a knob of butter right at the end for a glossy finish.
- Add a splash of white wine, sherry, or brandy when whisking the drippings for extra depth.
- Toss in a sprig of thyme or rosemary while simmering, then remove before serving for a fragrant finish.
- For ultra-silky gravy, strain it through a fine mesh sieve just before pouring into a jug.
Suggestions & Substitutions
- Herb selection & ratios: Use a mix you like, but balance bold herbs (rosemary, sage) with lighter ones (parsley). For herbs like thyme and sage, dried versions may still be potent; parsley and rosemary, however, shine best when fresh.
- Citrus zest: Zesting lemon or orange adds aromatic oils and brightness to the butter.
- Butter + olive oil: Adding some olive oil helps the butter stay soft and spread more easily under the skin.
- Make ahead: The herb butter can be prepared 1–2 days ahead; store it refrigerated.
- Spatchcock option: If you’d like to shorten roasting time and have more even cooking, flattening the bird (spatchcock) and using garlic-thyme butter is a great alternative.
- Basting vs. no basting: Some advanced roasts (especially spatchcocked ones) eliminate basting not to cool the oven, relying on the internal butter under the skin.
- Skin protection: Wrap wings with foil early to prevent burning.
- Monitoring doneness: Use not just visual cues but a reliable thermometer; the thigh flesh should be ~165 °F internally. If inserting a skewer yields clear juices (no pink), that’s a secondary indicator.
Pro Tips for Success
- Plan Ahead with Dry Brine – Start at least a day before (up to 3 days). A dry brine seasons the meat all the way through and helps the skin roast up beautifully crisp.
- Use the Right Salt – Stick to coarse sea salt or kosher salt. Their larger crystals distribute seasoning evenly without making the turkey overly salty. Avoid fine table salt.
- Injector Magic – If you have a meat injector, use it! Injecting melted herb butter or pan drippings into the breast and thighs every 30–45 minutes keeps the turkey extra moist and flavorful.
- Watch the Temperature, Not the Clock – While a stuffed turkey usually needs about 15 minutes per pound at 180°C / 355°F, always rely on a meat thermometer. The thickest part of the thigh should reach 74°C / 165°F.
- Foil is Your Friend – If the skin is browning too quickly, tent the turkey loosely with foil. You can also wrap the wing tips in foil early to prevent burning.
- Citrus Brightness – Don’t skip the lemon or orange. The zest in the butter and fruit in the cavity add a festive aroma that balances the richness of the meat.
- Rest Before Carving – Always rest your turkey for at least 30 minutes before carving. This allows the juices to redistribute so every slice stays moist.
- Gravy Shortcut – If you want less stress on the day of, make gravy ahead with butter and stock. Then finish it with drippings once the turkey is roasted for that signature flavor.
Helpful Q&A
Yes. Use about one-third the amount of dried herbs since they are more concentrated. Thyme and sage work especially well dried, while rosemary and parsley are best fresh if possible.
Because the butter under the skin bastes the meat as it melts, constant basting isn’t necessary. If you’d like, you can spoon pan drippings over the turkey every 30–45 minutes for extra flavor and shine.
You can skip this step and still get a juicy, flavorful bird. The butter under the skin and the dry brine provide plenty of moisture. But if you want to take it to the next level, an injector is a worthwhile tool.
A stuffed turkey typically roasts for about 15 minutes per pound at 180°C / 355°F. However, always rely on a thermometer. The thickest part of the thigh should reach 74°C / 165°F.
No. By the time it’s ready to roast, the salt will have fully absorbed into the meat. Simply brush off any excess salt before cooking.
Refrigerate carved turkey in an airtight container for up to 4 days. Freeze in freezer bags (without skin) for up to 3 months. To reheat, cover with foil and warm gently at 150°C / 300°F with a splash of stock to keep it moist.
Absolutely. If you prefer not to stuff your turkey, simply place aromatics like onion, garlic, citrus, and herbs inside the cavity. This keeps the flavor festive without the extra step.
Pro Tip: Leftovers = opportunity. They become pure gold when baked into these cozy leftover pies with puff pastry.
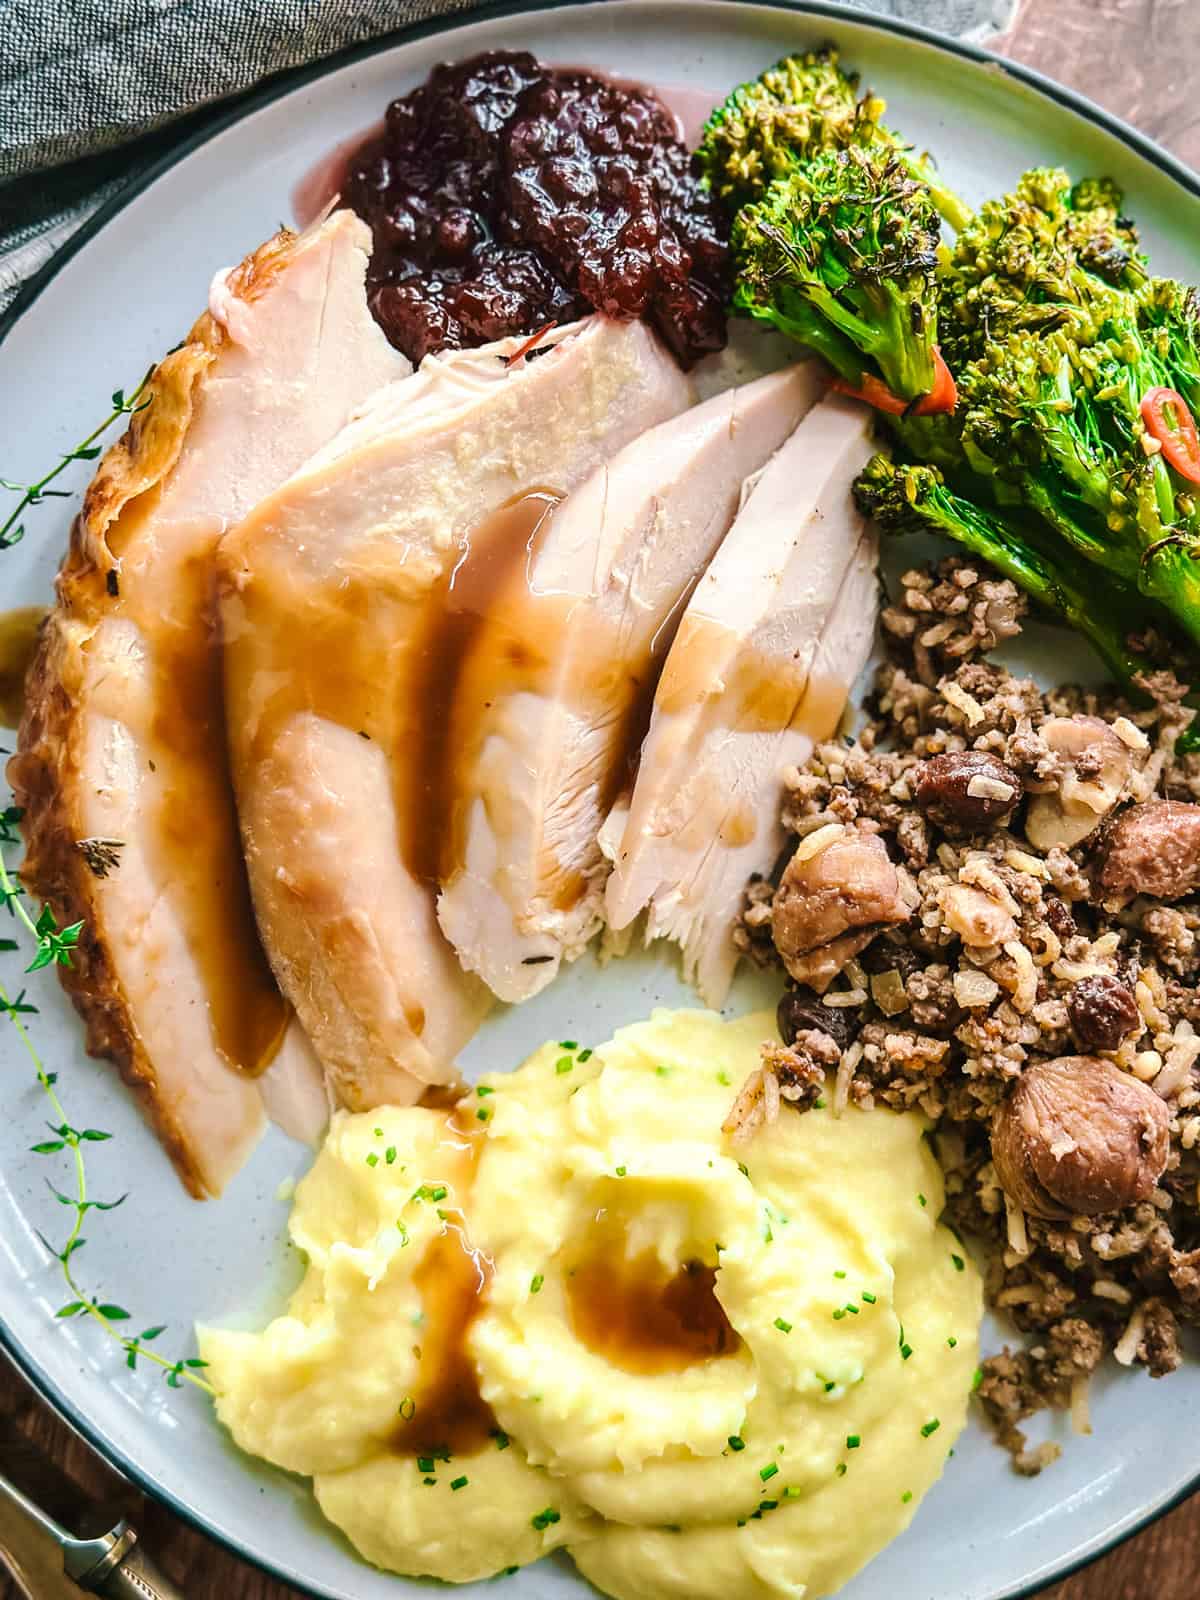
Christmas turkey side dishes
Every great turkey dinner deserves a spread of festive sides. Here are some delicious options that balance tradition with a Greek twist:
- Potatoes – We always make two kinds to please everyone at the table: classic creamy mashed potatoes and Greek-style lemon potatoes with crisp edges and bright citrus flavor.
- Salad – Roasted broccoli and cauliflower create a colorful, hearty salad that adds a healthy balance to your holiday menu. A traditional Greek lettuce salad (maroulosalata) is also a refreshing choice, simple yet festive.
- Vegetables – Roasted cabbage may sound unusual, but it’s one of our favorite Christmas sides. Tender, caramelized, and full of flavor, it pairs beautifully with the richness of the turkey.
- Rice – Not everyone is a potato fan, so this festive pilafi is the perfect alternative. Made with fluffy rice, toasted pine nuts, chestnuts, and cranberries, it’s fragrant, colorful, and full of holiday spirit.
- Something Sweet – No Greek Christmas table is complete without dessert. End your feast with Melomakarona (honey-dipped spiced cookies), Kourabiedes (powdered sugar almond cookies), or a couple of trigona-almond triangles. These traditional sweets bring warmth, good luck, and a little sparkle to the holiday season.
More Holiday dishes


Cooked it? Rate it!
If you tried this recipe, I’d love to know how you liked it — drop a comment below or tag me on Instagram @thegreekfoodie__.
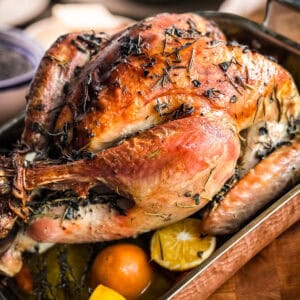
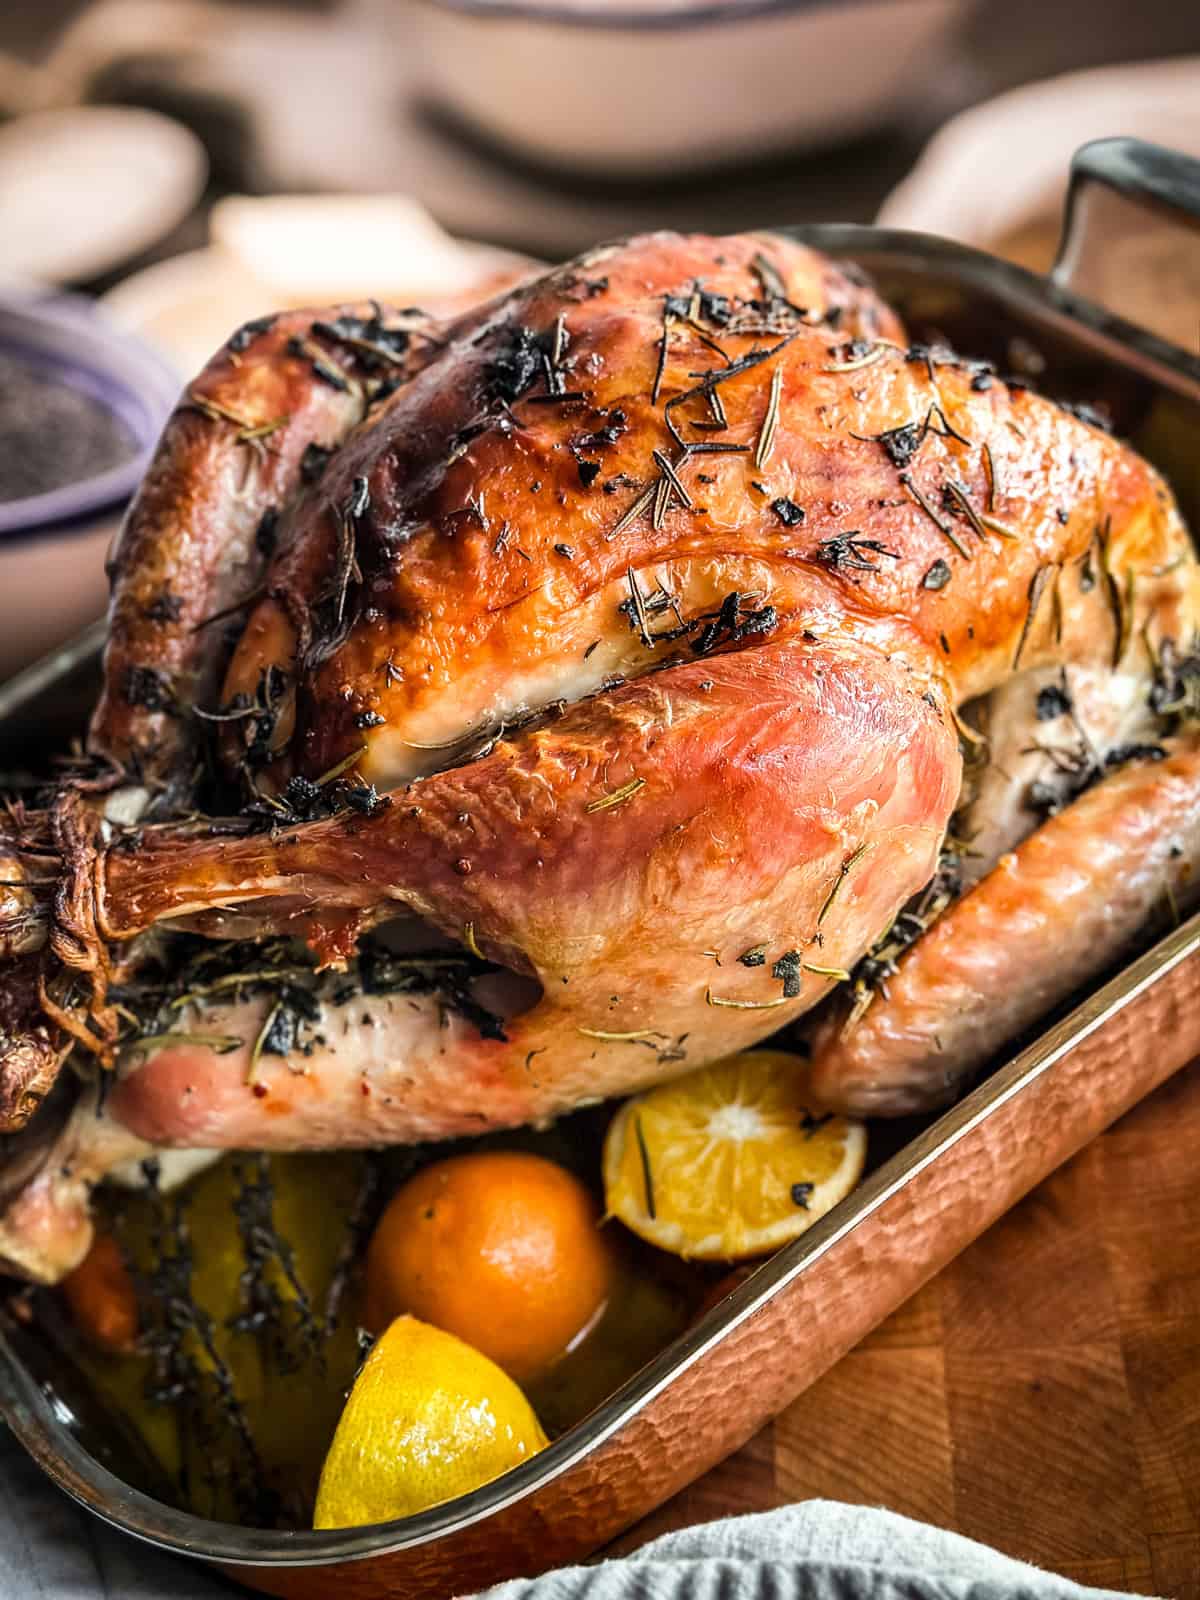
Christmas Turkey With Herb Butter
Equipment
- kitchen twine
- meat trussing needle or metal skewer
Ingredients
- 1 whole turkey, about 10-12 lbs
- sea salt
- 1 cup butter, softened
- fresh thyme
- fresh rosemary
- 2-3 oranges
- 2-3 lemons
- 2-3 carrots
- 2 garlic heads
- Greek stuffing
For the gravy
- 1½ cup turkey drippings
- ½ all-purpose flour
- 2 cups turkey stock
- freshly ground pepper
Instructions
Brine
- Start at least one day (and up to three days) before you intend to roast your turkey. Remove the giblets from the cavity, then pat dry well all over with paper towels both inside and outside
- Cover the turkey with coarse sea salt.Place the salted turkey on a rack inside a rimmed baking sheet to catch drippings or in your cooking pan. Refrigerate it uncovered for at least 1 hour per pound (14 hours for a 14-pound turkey). With dry brining, you can go up to three days of resting. If having a raw, uncovered turkey in your fridge feels uncomfortable, loosely cover it with plastic wrap or a brining bag. For the crispiest skin, uncover the turkey for at least the last six hours before cooking.There’s no need to rinse the turkey before roasting; there shouldn’t be any salt residue left.
- Make the Greek stuffing
Make the herb butter
- Roughly chop the herbs with a sharp knife or in a food processor. Mix the chopped herbs ¾ of the softened butter.
Stuff and truss the turkey
- Turn the turkey upside down and gently fill the neck cavity with stuffing. Once filled, carefully tuck the neck skin over the filling and secure it neatly against the underside of the turkey. You can sew it closed or use a long toothpick or skewer.Close the cavity. You can use a thread and a long thick needle or a long skewer with plenty of kitchen twine tied tightly on one end. Pierce the skin on the right side of this flap with the sharp point of the needle. Slide the needle and thread the loose skin from one side of the cavity to the other as tight as possible. Pass the needle through a couple of times if needed. Use the extra twine to tie the legs crossed tight over the cavity.Fold the wings under the turkey or cut them with poultry scissors. If you leave the wings as they are, wrap them with aluminum foil to avoid burning.
Roast
- Gently lift the breast skin from the flesh as much as possible without tearing it. Insert some butter under the skin wherever you can. It's okay if you don't go too far in.Rub all the herb butter all over the turkey.
- Arrange orange and lemon halves, herb sprigs, carrots and a couple of heads of garlic(cut the top off).
- Lay the buttered turkey on top of the fruits, veggies and herbs. Cover with aluminum foil. Roast turkey at 200°C / 400°F for an hour.
- Lower the oven temperature to 180°C / 355°F. Uncover and continue roasting.
- In a cup, melt the rest of the butter and add some herbs to infuse it. Inject butter inside the thickest part of the thighs and breasts every half an hour of roasting.
- When the melted butter in the cup is used, draw the buttery dripping from the bottom of the pan and inject it into the turkey.
- A stuffed turkey should roast for 15 minutes per pound at 180°C / 355°F. Use a meat thermometer to ensure the turkey is at 74°C / 165°F. Cover with foil and allow the roasted turkey to rest for 30 minutes before carving.
Make the gravy
- Pass the turkey drippings through a sieve and use it to make the gravy.
- Heat ½ cup of the turkey drippings in a saucepan over medium-low heat for three minutes. Whisk the flour into the drippings until golden, about 5 minutes. Add the rest of the drippings and keep whisking.
- Whisk the turkey stock into the flour mixture. Increase the heat to medium and cook, whisking continuously, until the gravy is smooth and creamy, 5 to 10 minutes, depending on your preference in consistency. Season with freshly ground pepper to taste and serve immediately.
Notes
- To check if the turkey is done, insert a thin skewer into the leg. If the liquid that comes out is pale pink, it needs more cooking. If it comes out clear, the turkey is done.
- If you have a meat thermometer, insert it into the leg (away from the bone, as the bone develops a higher temperature than the meat). If it shows 74°C / 165°F, then it is ready.
- Remove the turkey from the oven and cover it with aluminum foil for 30 minutes to recover its juices.
- Use any kind of root vegetables for the pan: carrots, turnips, celery roots, onions, and garlic.
Nutrition