
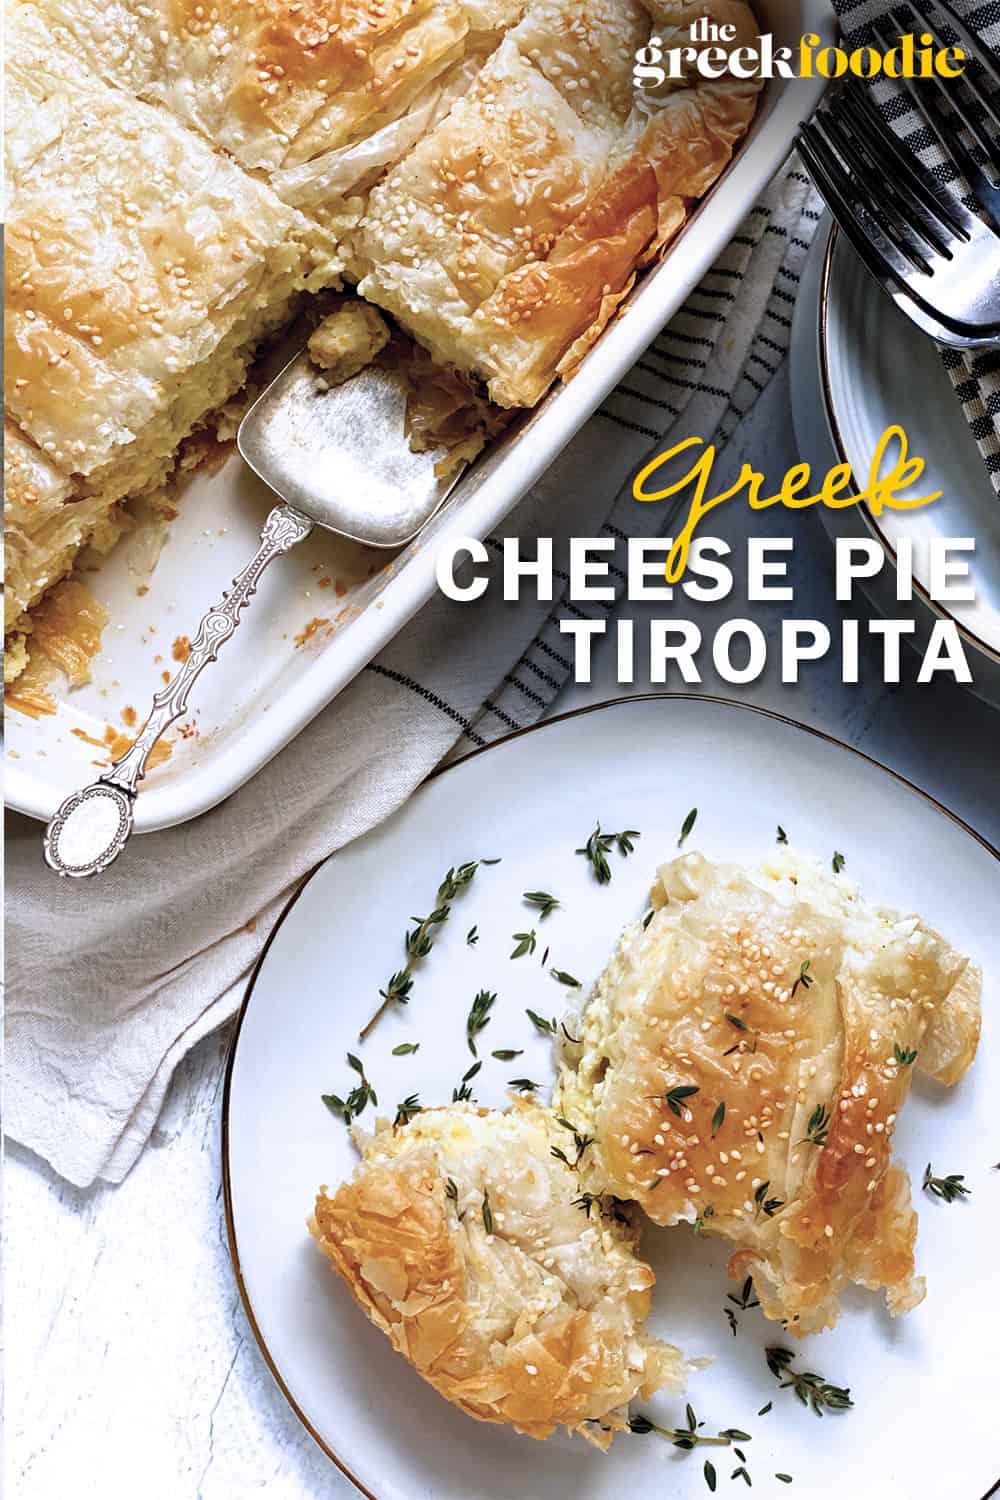
Golden, crisp phyllo layers filled with warm, melty feta and creamy cheese — that’s tiropita, the beloved Greek cheese pie that graces every Greek home, bakery, and breakfast table. My version is the easy one; no homemade dough, no tricky folding, just a handful of simple ingredients and a foolproof layering method for a pie that’s light, fluffy, and irresistibly flavorful.
This easy tiropita comes together with store-bought phyllo, good feta, and a touch of milk to create a perfectly puffed, melt-in-your-mouth texture.
What cooks say:
“This is the third time I have made this amazing savory cheese pie, and it surely will not be the last time. It is a big success in my house–it is so tasty, I love the smell of the fresh thyme mixed with cheese when it comes out of the oven. It is perfect for lunch or dinner with a little side salad, and it keeps well in the fridge for a few days.
Thank you, Jenny, for introducing me to a favorite recipe!”
KARIN Kautzky
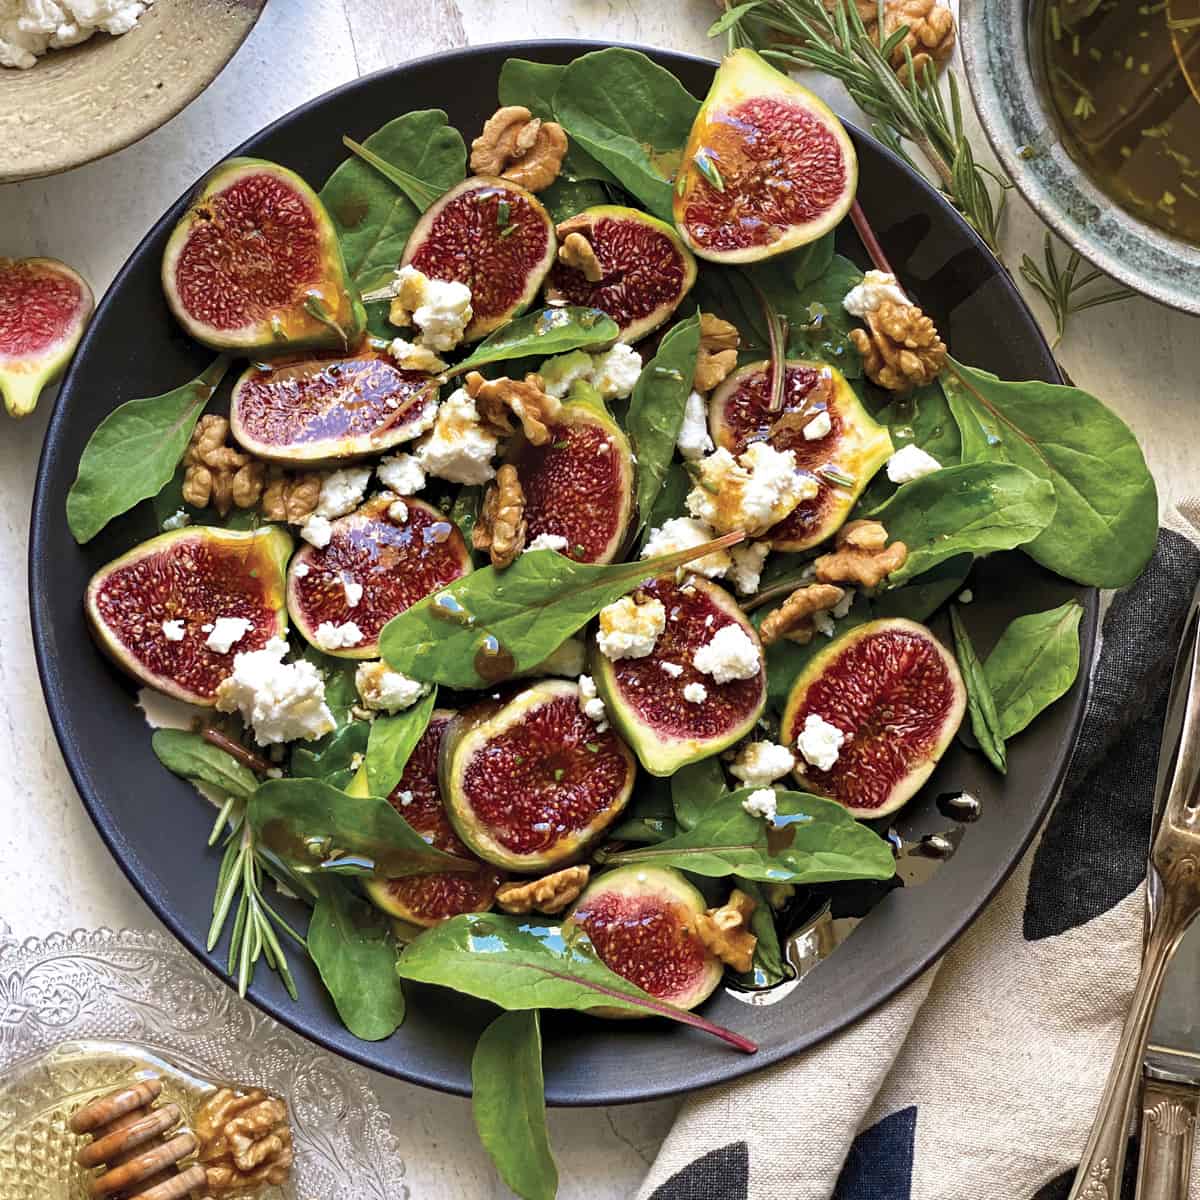
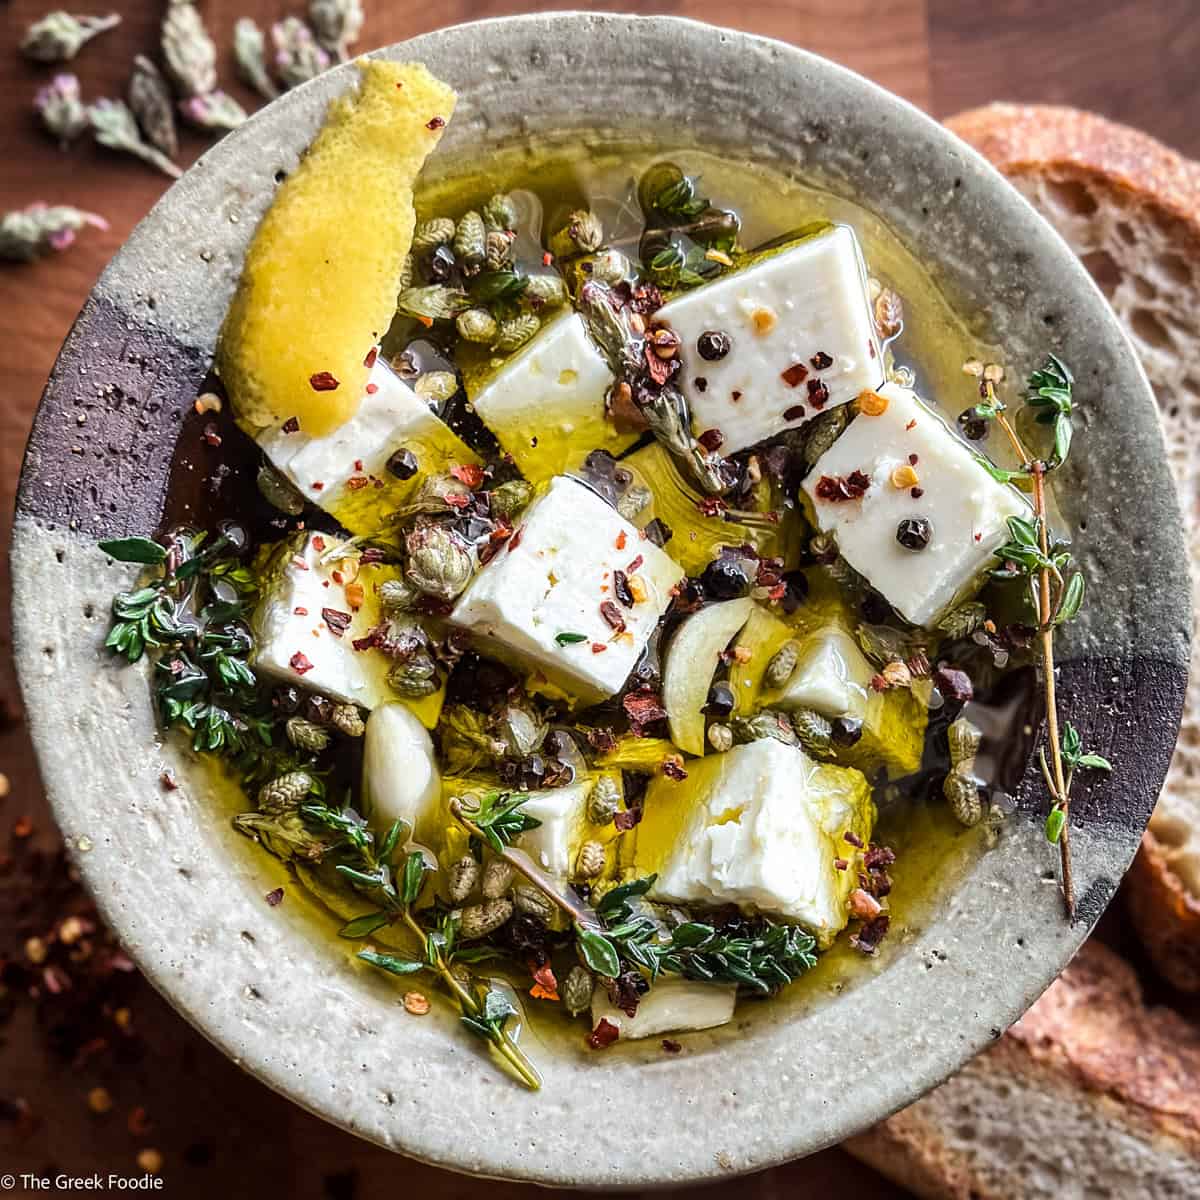
If you love our Easy Greek Cheese Pie, you will also love this Spanakopita-Spinach Pie, Zucchini and Potato Pie or Savory Greens Pie!

Why you will love Greek cheese pie
What kind of cheese is best for tiropita
The secret to a great Greek cheese pie (tiropita) lies in the quality of your cheeses.
- My foundation is always feta, and it has to be Greek. I always use authentic Greek feta made from sheep’s milk. Avoid low-fat or pre-crumbled versions — they tend to be drier and less flavorful. Authentic Greek feta, made from sheep’s milk, has the perfect tang and crumbly texture. Some Greek fetas are saltier than others, but for tiropita, choose one that’s mild and not overly salty. If you’re in the U.S., I recommend Mt. Vikos or Dodoni feta; both are Greek, mild, and easy to find.
- To balance feta’s sharpness, I add gruyère or its Greek cousin, graviera (which I pick up whenever I’m in Astoria). Graviera is slightly sweet, gently salty, and melts like a dream.
- Finally, a spoon or two of cream cheese gives the filling a lush, creamy body that ties everything together.
🧀 Tip: A blend of feta + graviera (or gruyère) + a touch of cream cheese delivers the perfect mix of tangy, melty, and fluffy, the essence of an unforgettable tiropita.
Our cheese pie method
This tiropita recipe is wonderfully easy because it uses store-bought phyllo pastry and good-quality cheese — no need to make dough or tackle any complicated pastry steps.
- The magic is in the layering: buttered phyllo sheets are gently scrunched and added to the pan, creating those irresistible flaky pockets. Then comes the cheese mixture, spread evenly before topping with more scrunched, buttered phyllo.
- Finally, a cup of milk is poured all over the pie before baking.
Why the milk? It’s a little Greek secret; it makes the cheese pie fluffier, or as we say in Greece, “αφράτη” (afrati) — light, creamy, and beautifully puffed as it bakes.
Here is what you need
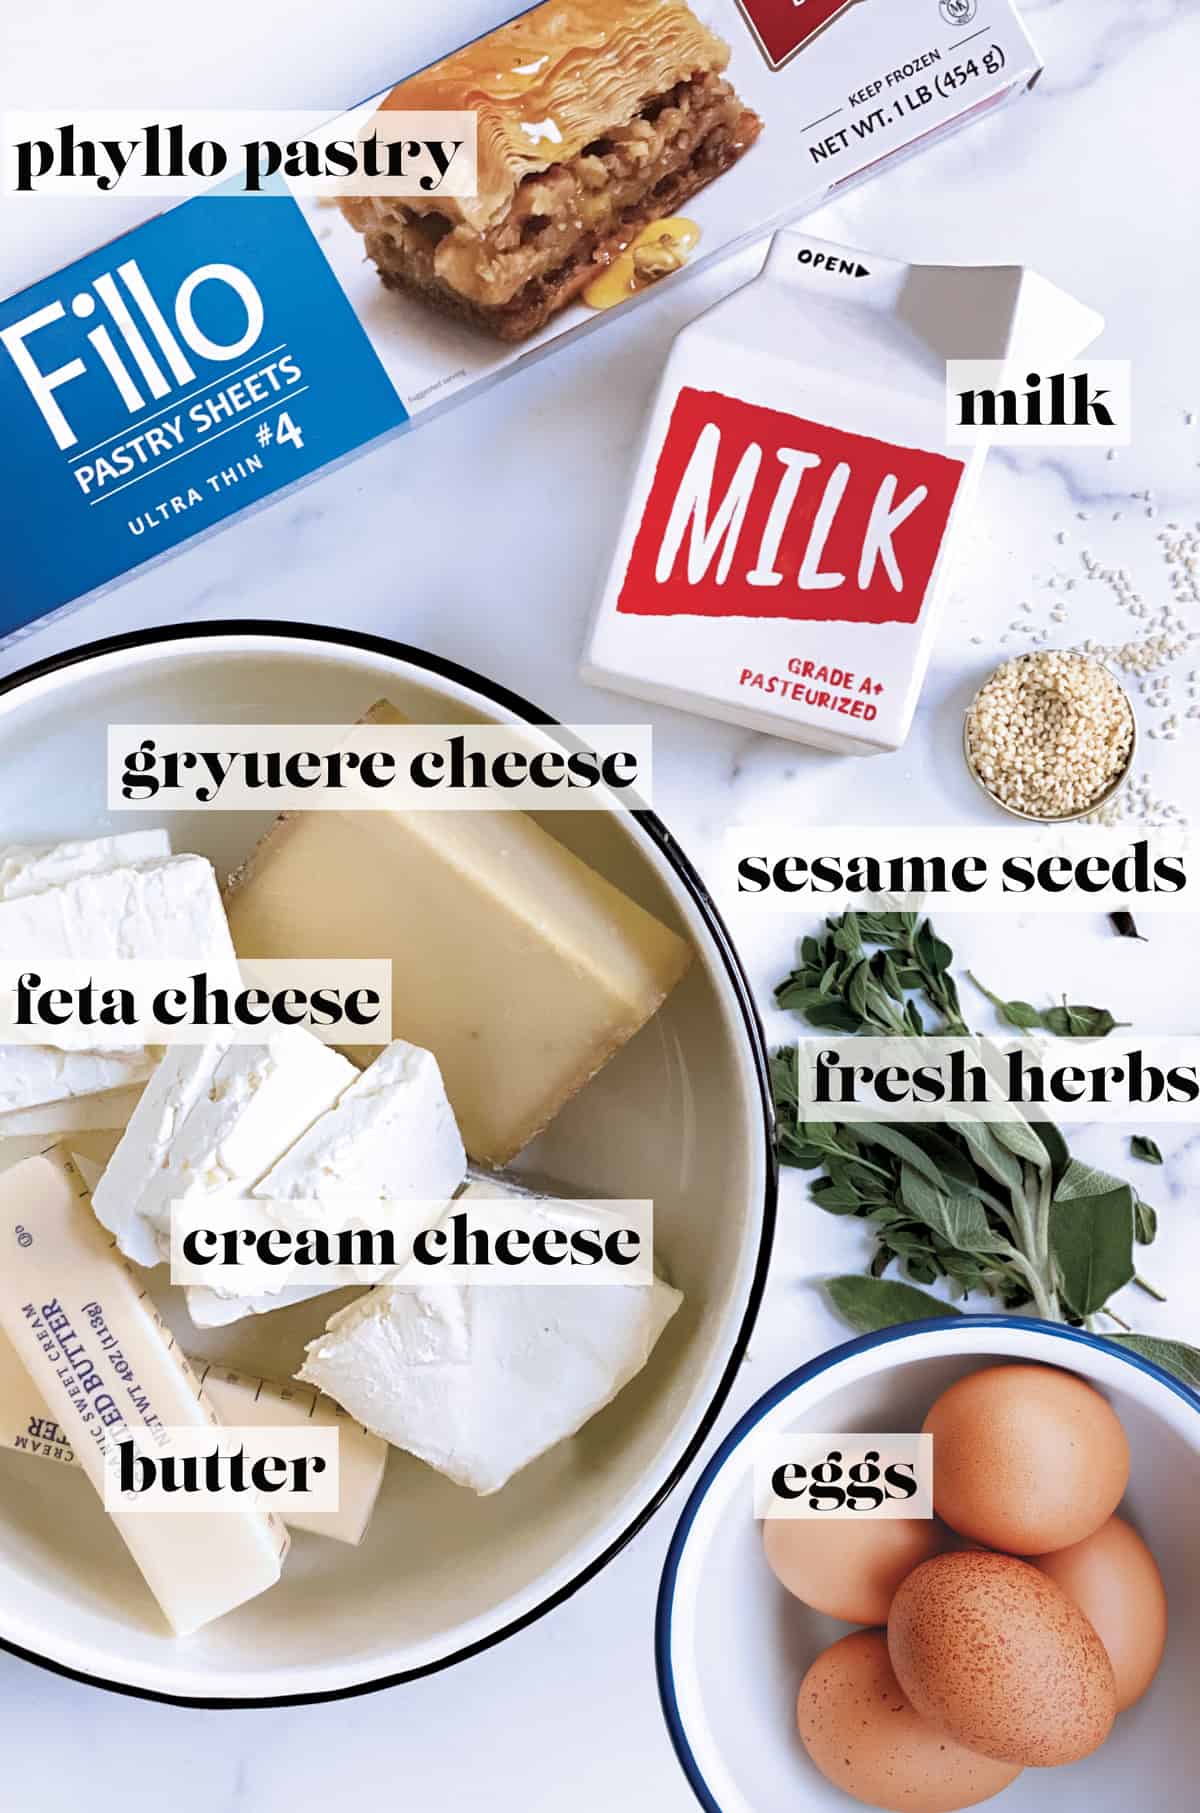
- Greek feta cheese – Choose a good-quality block like MT Vikos or Dodoni, always packed in brine. Avoid pre-crumbled feta, the brine keeps it creamy and flavorful.
- Gruyère cheese – Sweet, slightly salty, and nutty. It melts beautifully and balances the tanginess of the feta.
- Cream cheese – Adds luscious creaminess to the filling and smooths out the stronger cheese flavors.
- Milk – The secret weapon added right before baking; it makes the tiropita wonderfully αφράτη (fluffy).
- Eggs – Help bind the filling and create that rich, custardy texture.
- Phyllo sheets – The thickness can vary. A package of phyllo No.4 has about 12–14 sheets, while No.10 (thicker) includes 6–8 sheets. Both work beautifully; No.4 gives a lighter, flakier result.
- Butter – I always use salted butter unless a recipe specifies otherwise. It adds richness and depth to each flaky layer.
- Fresh herbs – Thyme leaves, sage, or oregano all pair beautifully with the cheese filling.
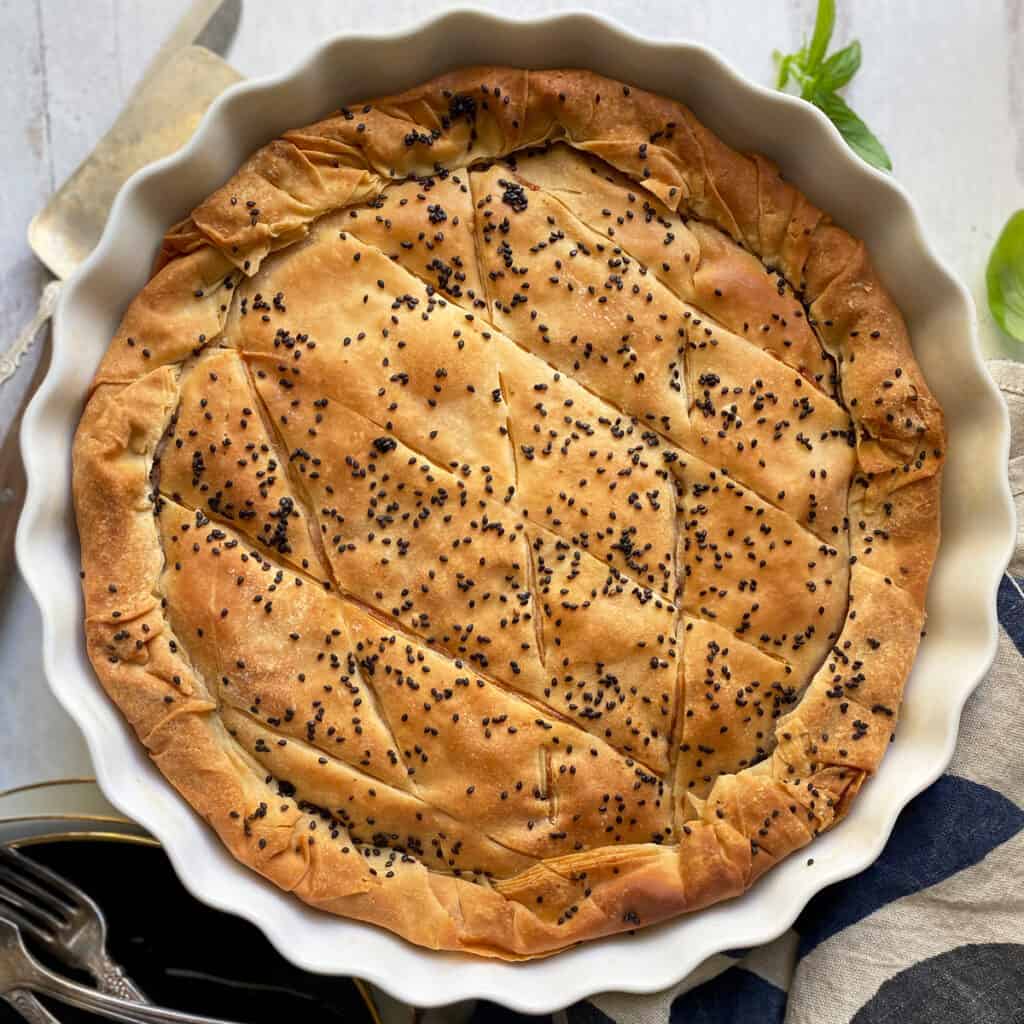
- Sesame seeds – Sprinkle on top for a touch of color and texture. You can use blond or black sesame seeds or skip them altogether if you prefer.
Detailed measurements and step-by-step instructions can be found on the recipe card at the bottom of the page
Step by step

Step 1 — Preheat & prepare the filling
Preheat the oven to 350°F (180°C).
In a large bowl, mix the cheeses, thyme leaves, eggs, salt, and pepper to taste until well combined.

Step 2 — Create the phyllo base
- Brush two sheets of phyllo with melted butter and lay them gently in the baking pan, one at a time.
I use phyllo that’s purposely larger than the pan so the edges hang outside — this helps later when rolling them in to create a border. - Take another two sheets and repeat, placing them to cover the remaining sides of the pan. Ensure all the phyllo edges are buttered to prevent them from drying out while you work.
- Divide the remaining phyllo sheets in half. Set one half aside, covered with a damp towel to prevent drying.
- Brush each phyllo sheet (from the first half) with butter, crumple it gently, and place it in the pan. Repeat until all sheets from that half are used.

Step 3 — Add the cheese filling
- Spread the prepared cheese mixture evenly over the crumpled phyllo base.
- Set aside two phyllo sheets for the top, then use the remaining half of the package to cover the filling, brushing each sheet with butter, crumpling, and layering as before.
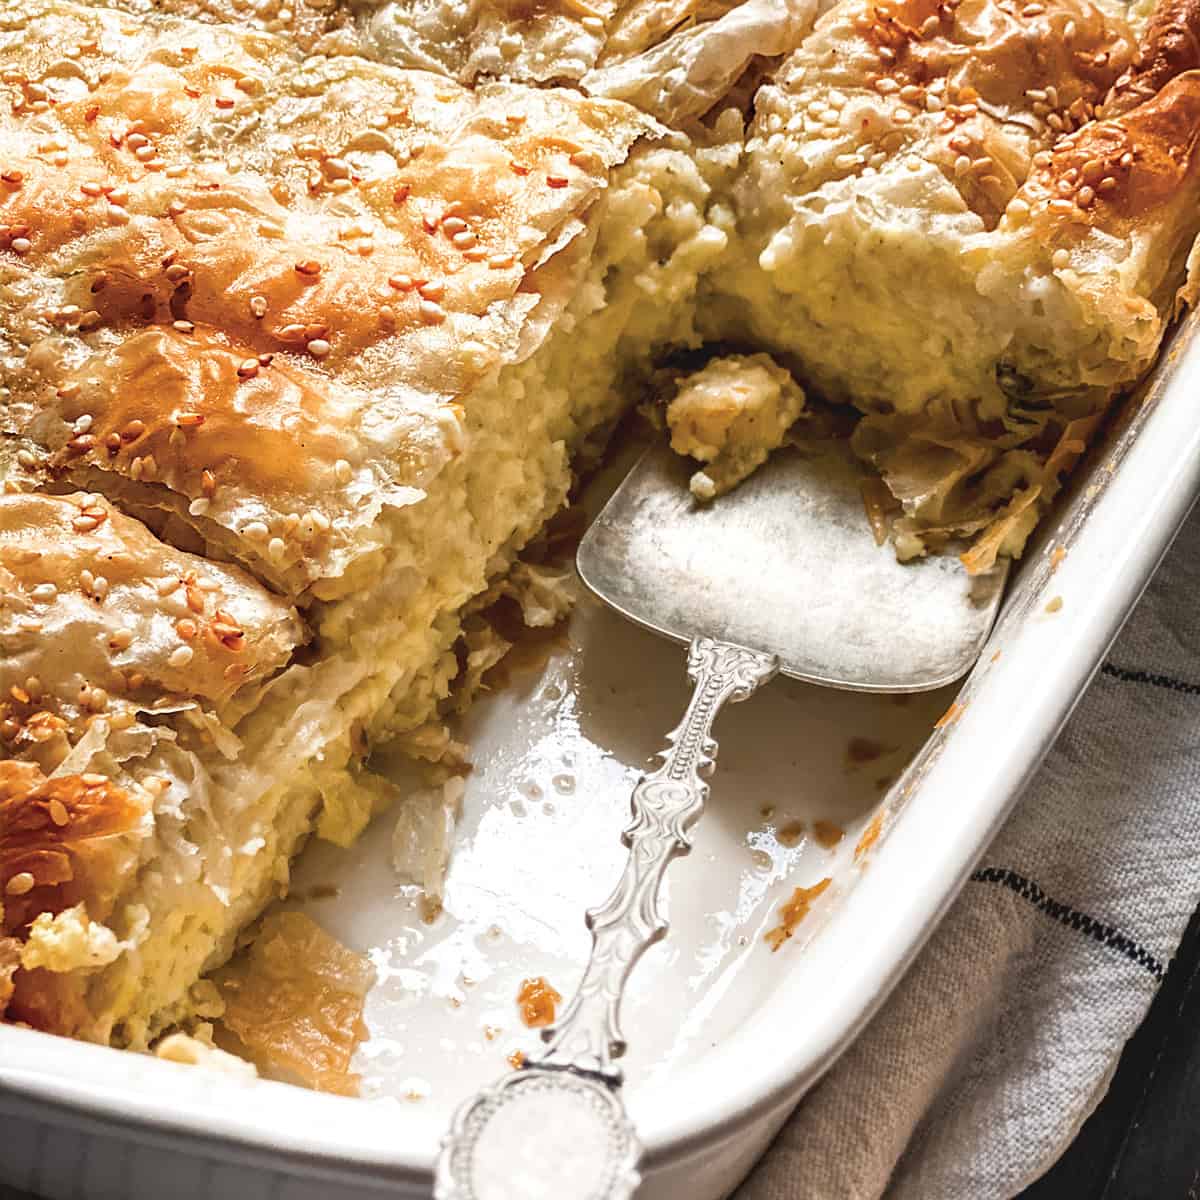
(Optional: You can reverse the direction of your layering for a more rustic texture.) - Place the final two buttered sheets flat over the top. Gently bring all the overhanging edges into the pan, folding them to create a “phyllo border.”
- Score the top gently with a sharp knife.
Pour the cup of milk evenly all over the pie and sprinkle generously with sesame seeds.

Step 4 — Bake
- Let the pie sit for 10 minutes so the milk fully absorbs.
- Cover the pan with aluminum foil and bake for 10 minutes.
- Remove the foil and continue baking for 30 minutes, or until the pie is cooked through and the top is beautifully golden brown.
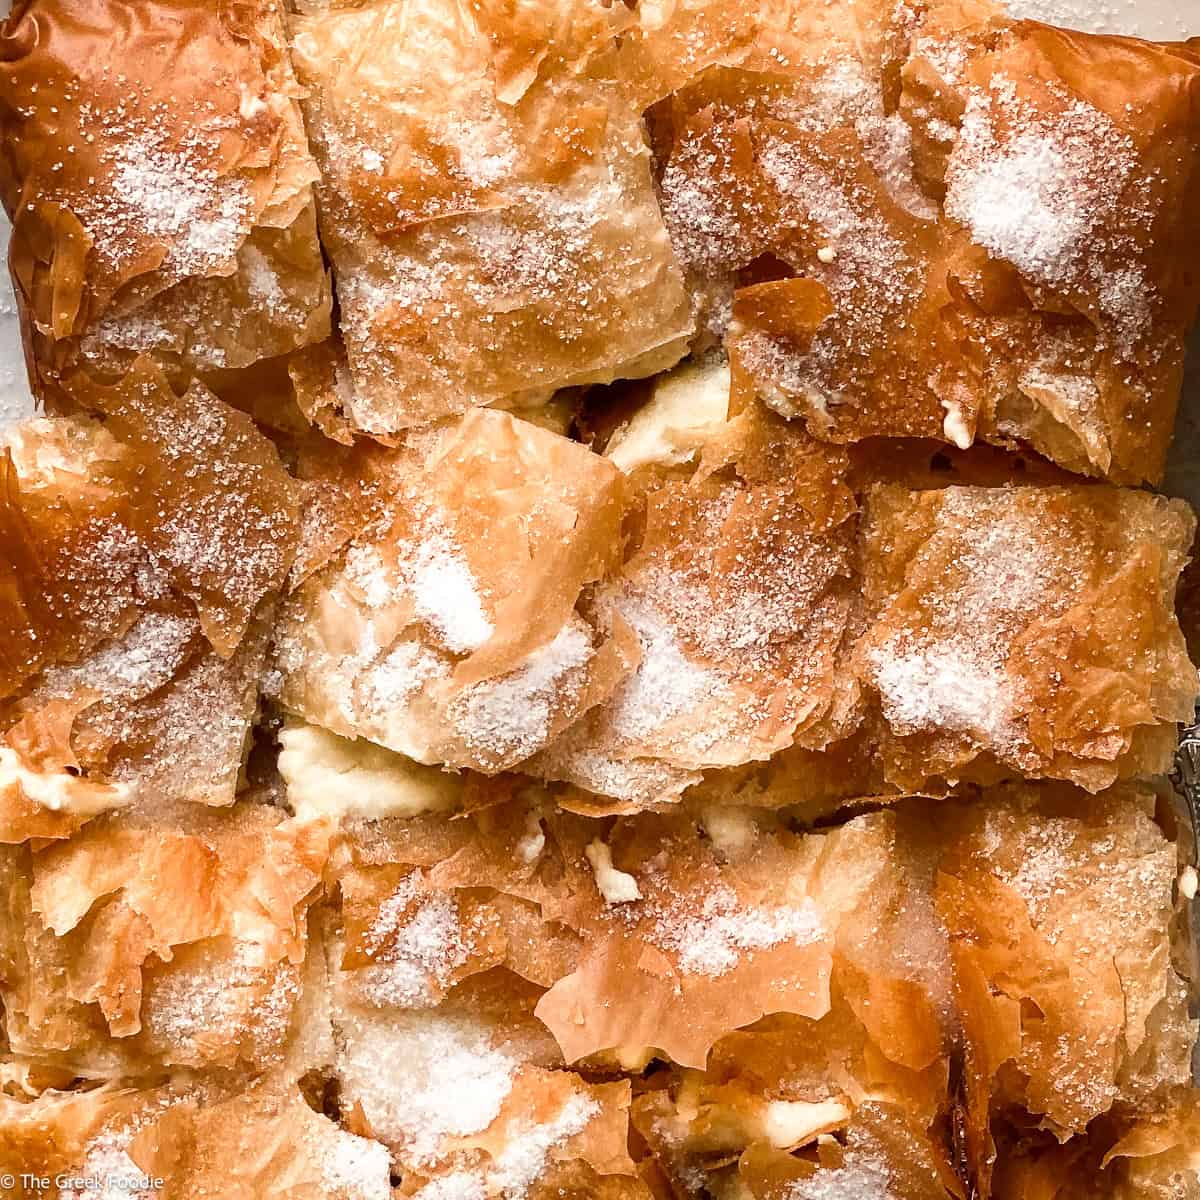
Let it rest briefly, then slice and enjoy!

Pro tips for success
- The eggs I use for this pie are regular/average size. If you have large or extra-large eggs, use 3 instead of 4 in the mixture. If the mixture feels too runny add a little more feta cheese.
- If fresh herbs like thyme are not available, use dried versions. Dried oregano, thyme, and even Herbs de Provence will go well with this cheese pie.
- Don’t add salt to the cheese mixture. Feta cheese and gruyère are already salty, even if they are mild versions. If unsure, conduct a taste test and add salt sparingly.
- Some cooks skip the milk and pour a cup of soda water over the pie before baking. The result is nice crispy phyllo and a fluffy texture.
Variations & substitutions
- Mini tiropitakia: Make small triangles or rolls for appetizers.
- Herb twist: Add dill, mint, or oregano to the filling.
- Spicy: A pinch of chili flakes adds warmth.
- Cheese swaps: Try kefalotyri, gouda, or mozzarella.
- Olive-oil version: Use olive oil instead of butter for a lighter touch.
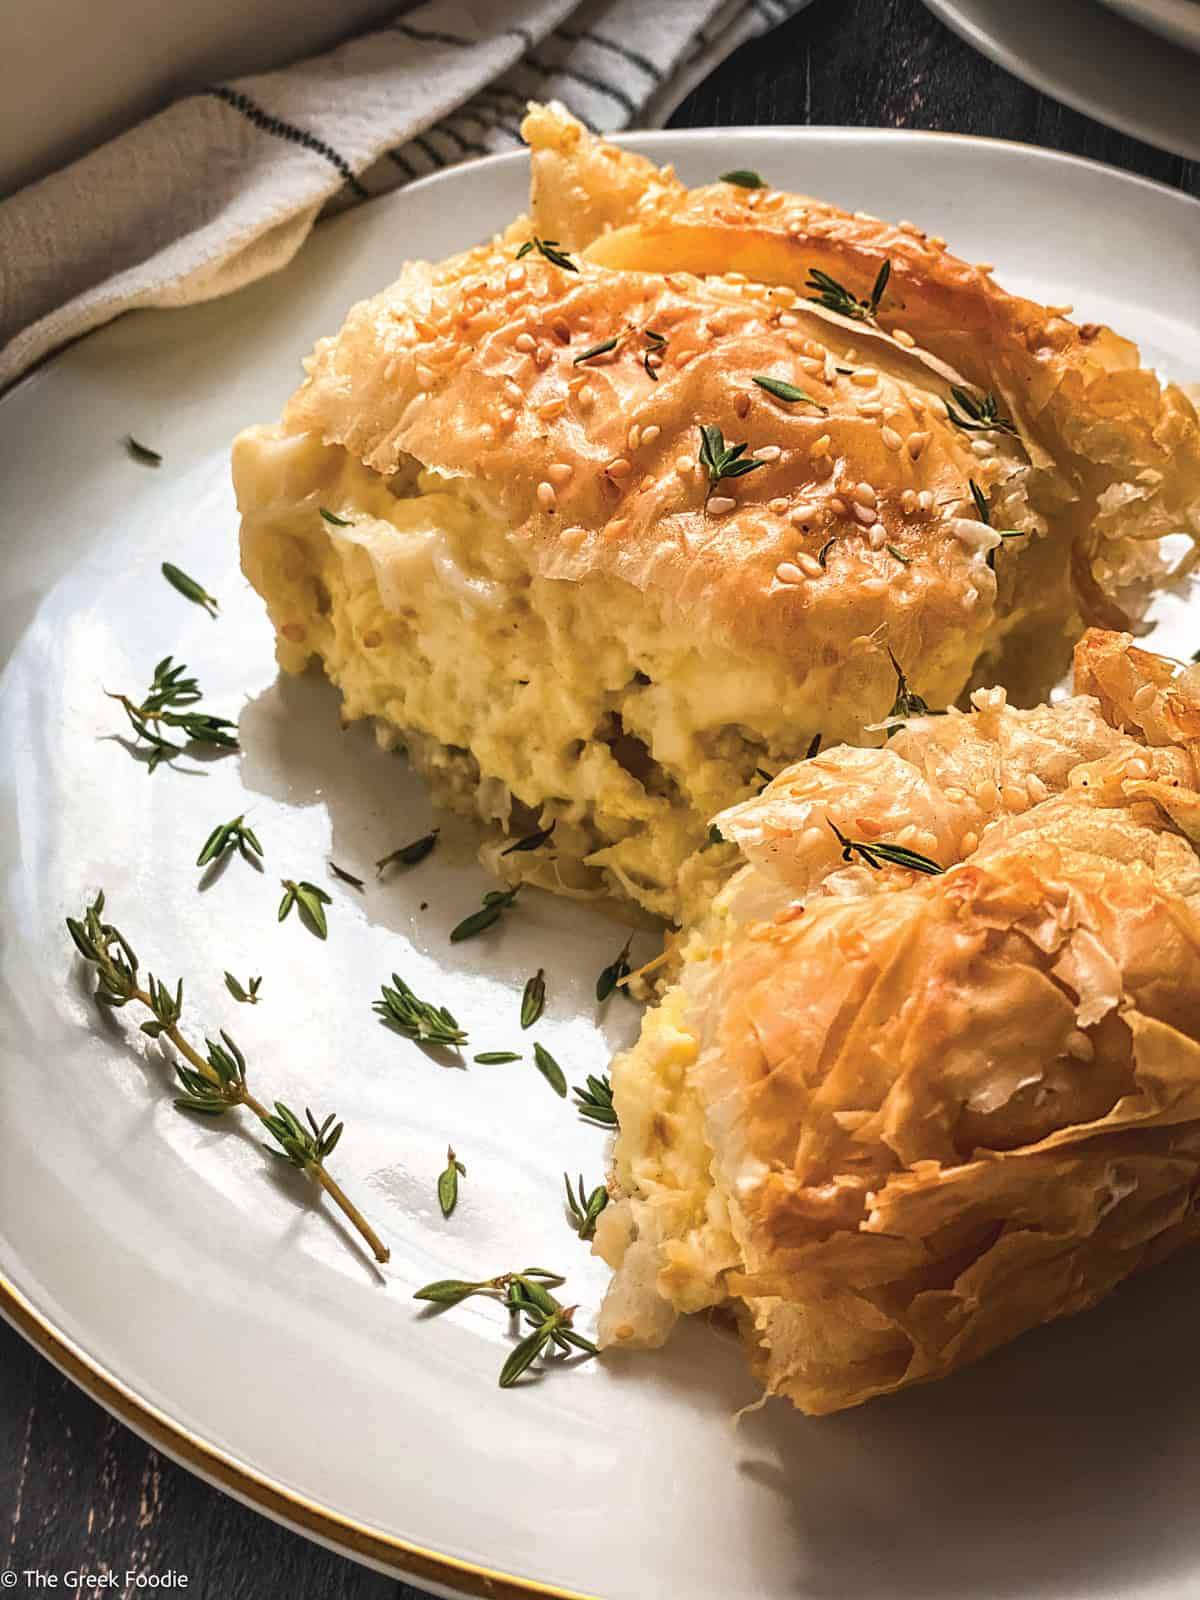
Serving Suggestions
Greeks eat a piece of cheese pie as a snack, quick lunch, as an appetizer or part of a main course. Serve tiropita warm or at room temperature with:
- A fresh green Greek salad, roasted vegetables, or even a fasolada, a hearty white bean soup, make for a lovely meal.
- Taverna-style with fried zucchini and eggplant, crispy fries, Greek greens-horta, keftedes-meatballs and chickpea or eggplant fritters.
Additional Q+A and tiropita tips
There are many kinds of phyllo available in supermarkets. I like to use the largest size, about 14″ x 18″. Some of my go-tos are Fantis and Fillo Factory. In Greek supermarkets, you will find phyllo sheets of different thicknesses. The thicker ones are perfect for a more rustic result. Any type of phyllo is suitable for a tiropita. Here, I provide directions for any thickness. It’s most important to check the freshness of the phyllo. Read the package and see when it was made and when the expiration date is. After a couple of times coming home with a box of old, dry phyllo that breaks easily, I learned my lesson.
Please avoid using shelf-stable “cheese.” Anything that can be stored at room temperature for months on end in a plastic container has a concerning amount of additives, and most importantly, it’s not really cheese.
Yes, you can. Store it in a freezer-friendly container and freeze for up to two months. Let the cheese pie reach room temperature, then warm it up in a 180°C / 350°F oven for 15 minutes or so.
You can! Skip the crumple method and use puff pastry sheets for the top and bottom. The cheese pie will be more decadent and more buttery but less traditional. Bake until golden.
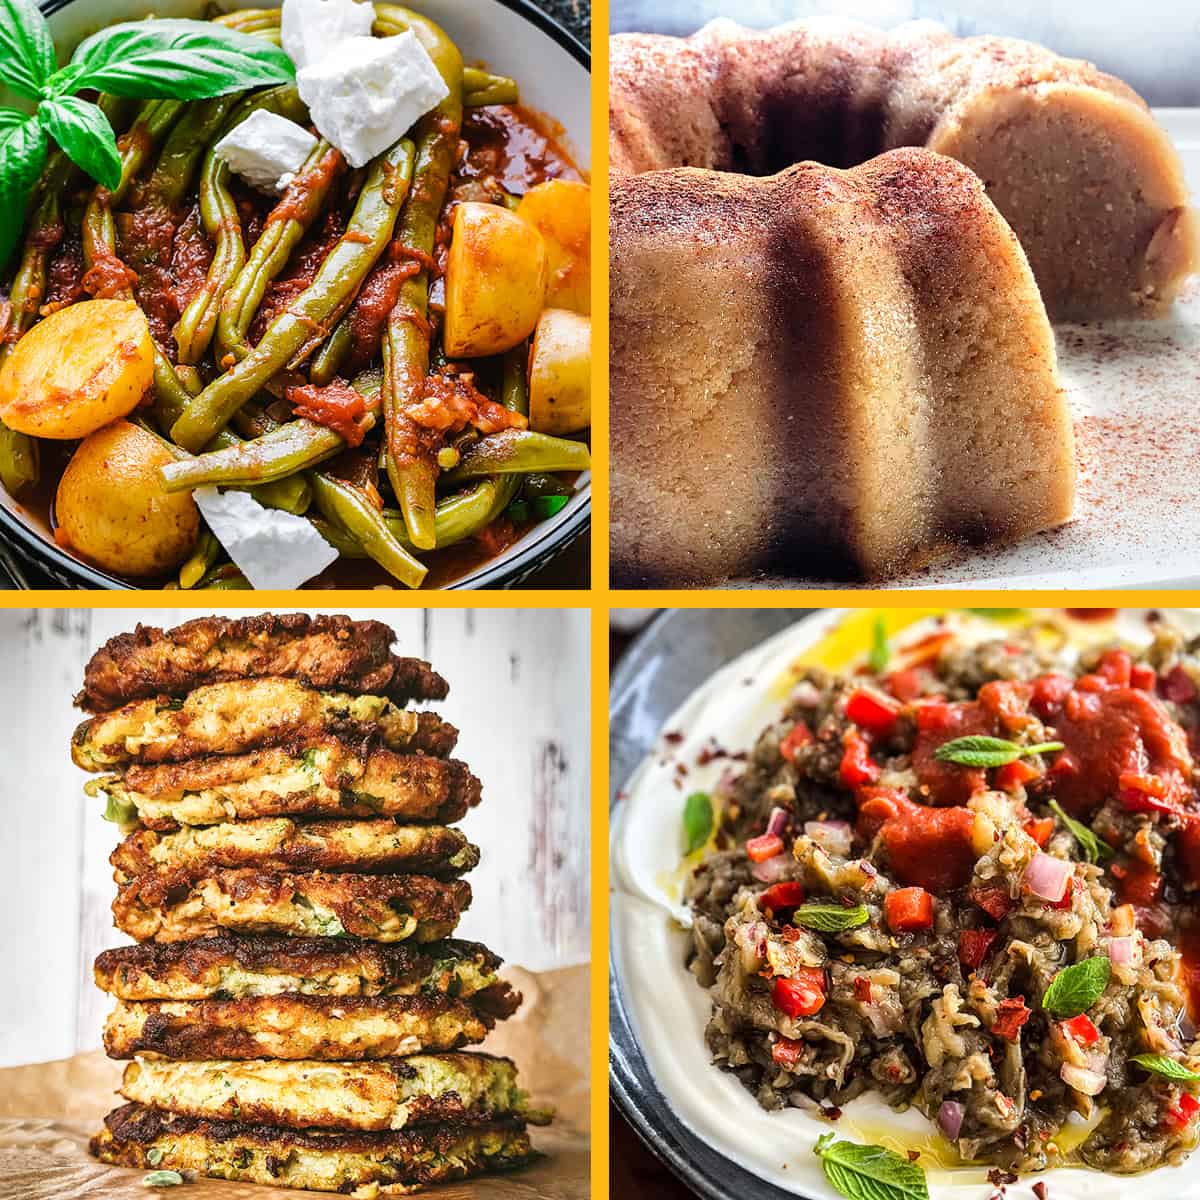
More Greek traditional pies


Cooked it? Rate it!
Please leave a comment, we love hearing from you! Please subscribe to our newsletter for the latest updates.

Greek Cheese Pie – Tiropita
Equipment
- 11" x 8" baking pan
Ingredients
- 0.6 lb Greek feta cheese I like Vikos and Dodoni.
- 12 oz gruyere cheese grated.
- 3.5 oz Philadelphia cheese About half of the classic package.
- 1 cup milk
- 4 eggs, medium-average size If you have large eggs please use 3.
- 1 box organic phyllo sheets
- 1.5 sticks butter melted
- 1 tablespoon fresh thyme leaves
- 1 tablespoon sesame seeds
Instructions
- Preheat the oven to 350°F (180°C).
- Melt the butter in a small saucepan over medium heat.
- In a large bowl, mix the cheeses, thyme leaves, eggs, salt, and pepper to taste until well combined.
- Brush two sheets of phyllo with melted butter and lay them gently in the baking pan, one at a time. I use phyllo that’s purposely larger than the pan, so the edges hang outside — this helps later when rolling them in to create a border.Take another two sheets and repeat, placing them to cover the remaining sides of the pan. Ensure all the phyllo edges are buttered to prevent them from drying out while you work.
- Divide the remaining phyllo sheets in half. Set one half aside, covered with a damp towel to prevent drying.Brush each phyllo sheet (from the first half) with butter, crumple it gently, and place it in the pan. Repeat until all sheets from that half are used.
- Spread the prepared cheese mixture evenly over the crumpled phyllo base.Set aside two phyllo sheets for the top, then use the remaining half of the package to cover the filling, brushing each sheet with butter, crumpling, and layering as before.(Optional: You can reverse the direction of your layering for a more rustic texture.)
- Place the final two buttered sheets flat over the top. Gently bring all the overhanging edges into the pan, folding them to create a “phyllo border.”Score the top gently with a sharp knife. Pour the milk evenly over the pie and sprinkle generously with sesame seeds.
- Let the pie sit for 10 minutes so the milk fully absorbs.Cover the pan with aluminum foil and bake for 10 minutes. Remove the foil and continue baking for 30 minutes, or until the pie is cooked through and the top is beautifully golden brown.
Notes
- Keep phyllo covered with a damp towel so it doesn’t dry out.
- Don’t overmix the cheese filling — gentle mixing keeps it airy.
- Use real Greek feta for authentic flavor.
- Pour milk evenly for a creamy, fluffy texture.
- Let it rest before slicing for clean, defined layers.
- Store: Refrigerate leftovers in an airtight container for up to 3 days.
- Reheat: Bake at 325°F (160°C) for 10 minutes to re-crisp the phyllo. Avoid microwaving.
- Freeze: Wrap tightly in foil and plastic wrap. Thaw overnight in the fridge and reheat in the oven.
Nutrition

This is the third time I have made this amazing savory cheese pie, and it surely will not be the last time. It is a big success in my house–it is so tasty, I love the smell of the fresh thyme mixed with cheese when it comes out of the oven. It is perfect lunch or dinner with a little side salad, and it keeps well in the fridge for a few days.
Thank you Jenny for introducing me to a favorite recipe!
Thank you so much Karini! x Jenny
Wow, this looks fantastic. I am a cheese lover. With the addition of that crispy phyllo pastry, this is sure to be a hit in my house. Great for brunch or dinner.
I think this will be a delicious addition to our family Christmas brunch. It looks amazing and I know it will be a huge hit!
Tasty! This Greek Cheese pie is making me crave right now! I am sure I will be able to finish more than one slice of this mouthwatering pie.
From the looks of it, we can say this this be an instant crowd favorite. We can never go wrong on a recipe with included cheese as the main ingredient. Thanks for sharing this to us, loved it!
Yum! I can’t believe that I am drooling right now! This Greek Cheese pie is sooo mouthwatering!
This Tiropita looks amazing and I want it in my life now!! I love the combination of cheeses in this cheese pie and that buttery crust is holding all that goodness in . I am making this dish very soon!
I love all Greek food!! This pie though looks extra delicious. I’ll be adding it to our lunch recipes!!
That pie looks so light, airy and absolutely delicious! I’m a huge fan of savory pie and would choose this pie over sweet pie any day. Looks perfect for my palate
This looks so good! My husband goes to Greece often and love this vegetarian dish, I’ve never tried it but know I can make it at home. I can smell the cheese from here 😊
I was wondering, what is a serving size for this recipe?
Hi Brenda!
This recipe makes 16 pieces in my 11 x 8 inches baking pan. Each piece is about the size of my palm. (I have medium to small hands) 🙂
I usually serve one piece with some salad. That can be a great first-course or a tasty lunch. You can also cut the pieces smaller and serve them as an appetizer on a tray if you like.
I hope that helps!
Thanks so much for checking the recipe! It is a really delicious cheese pie; I hope you will like it. Come back here and let me know.
x Jenny
I used for eggs but it’s completely runny and ruined the tyropita
Hi Ileana!
I am so sorry the mixture was runny.
Were the eggs extra large by any chance? Did you use enough cheese? My eggs are usually of average size. If you decide to give it another chance if you only have extra-large eggs, use 3 and add some extra cheese if you need to. That will solve the runny mixture.
Feel free to email me to let me know if you tried it again and if you need anything.
Thanks so much for trying it!
Have a great evening, keep me posted,
Jenny
The size of the pan was not in the directions. Also, the size in the picture of phyllo dough looks thick. I’ve used phyllo dough for most of my life. It looks so delicious and I’m going to make it. I’m only wondering why the phyllo looks thick and twisted in the picture instead of flat layered with butter. I’ve made baklava and tiropita for 15 years and it’s so delicate and never looks that thick. Thank you for any feedback…. efcharistó
Hi Dena,
You are so right, the size of the pan will be added in the directions. My pan is an 11 x 8 baking pan.
The phyllo I use is not the thick at all, it is the regular thin phyllo sheets I get from my Greek Astoria market. It is not layered like you would on a baklava or a different kind of cheese pie. This is an easy cheese pie that only has two phyllo sheets on top and on the bottom and the middle is wrinkled up sheets with the filling. Maybe that looks thicker but it really isn’t. The wrinkled up sheets make the pie very fluffy – αφράτη.
Let me know how you liked it if you decide to try it.
Thanks so much for your comment!
x Jenny
Instead of milk could you use half and half?
Hi Charles!
Yes you can. The cheese pie will just be a little richer. I use half and half all the time when I am out of milk. You can use it as is or diluted with a little water.
Thanks so much!
x Jenny
Can you make it sweet
Hi Dorene,
You drizzle honey on top of the pastry before serving.
Feta and honey go very well together.
I will publish a recipe soon for Cretan bougatsa, which is a pie with phyllo and mizithra cheese (like ricotta mixed with feta) and is served with a sprinkle of sugar on top. It’s fantastic!
Thank you so much,
x Jenny
This cheese pie looks and sounds wonderful. I was just wondering if spinach could be added/layered with the cheese?
Hi Carol!
Sure, I don’t see why not turn it into a spinach pie! Just watch out for the moisture of the spinach. I recommend lightly saute the spinach in a little olive oil for 2 minutes, drain the extra liquid, and mix it in with the cheese.
I have a spanakopita recipe,
https://thegreekfoodie.com/greek-spanakopita-spinach-pie-recipe/
you can check out the filling. Keep in mind to change the quantities.
Thank you so much!
x Jenny
This dish is amazing! Soon, I will make it again. The filling set after the dish was allowed to cool to just warm. I bought aluminum pans 1/2 the 8×11 size. That way I can make 2 smaller ones. If I give it away to a friend, they do not have to return the pan. Wondering if this can be frozen before being cooked?
Hi Michelle!
I am so happy you liked the cheese pie. Great idea to divide in two and use aluminum containers. Yes, it can be frozen, uncooked in a freezer-safe container and bake right out from the freezer, no need to wait for it to thaw.
Thank you so much for trying this recipe!
x Jenny
Would 2 cloves of garlic through a garlic press ruin or add to the flavor?
I think it would add to the flavor. I love garlic so personally, I would go for it! There are Greek delicasies with similar flavors, like baked bread with cheese and garlic.
Let me know how it came out!
This looks so mouth-watering! Seems like something to give a try, my family will surely love this!
Doesn’t the bottom get soggy?
Hi Cristina,
Not really. It is not super crisp like the top but its not soggy either. The absence of ingredients with liquid such as tomatoes, zucchini, spinach, other greens etc. helps not to have a soggy bottom.
Thank you for checking out this recipe! x Jenny
I’m assuming you are using unsalted butter?
Hi! I use both salted and unsalted in my recipes.
For desserts I use unsalted unless specified otherwise. In my savory food I use whatever is in my fridge. If it’s salted I am careful with sea salt and season to taste afterwards if needed.
X Jenny
Just wondering, if you’re such a devotee of all things Greek, why are you now living in the U.S.? I would have thought that America is as far away from Greek culture as you can get!
Hi VeganAndy!
Actually I live in Greece at the moment. Daryl and I decided to share our time between our two countries since 2022. He retired from his corporate IT job and I work form home obviously so it was a no brainer decision. We live in Athens and visit the US frequently, we still have a residence there. In Athens, I get to spent some time with very old family members, catch up with new Greek food trends (there are some!) and enjoy my city again.
Thank you for your question!
x Jenny
PS And thank for reminding us that we need to update our about us page!
This will be the fourth time I have made this pie and I love it. I used to enjoy a hot pastry from the van, early in the morning, on the way back from a late night out in Neo Marmaras, when I worked there back in the 80’s. Takes me right back! Thank you for sharing.
Comments like yours brighten my day! Thank you so much Fee! Happy Holidays! x Jenny